Manage circulation rules
Circulation rules let you automate your asset checkout policies. You can set up rules based on asset type, user role, and building to define asset due dates and overdue charges. These rules apply when you check out assets from Check-Out Assets, Quick Circulation, an asset's details page, or a user's details page.
To set up rules:
- Select Settings > Circulation Rules. The Circulation rules page appears.

- Click + Add a new rule. A pop-up appears.
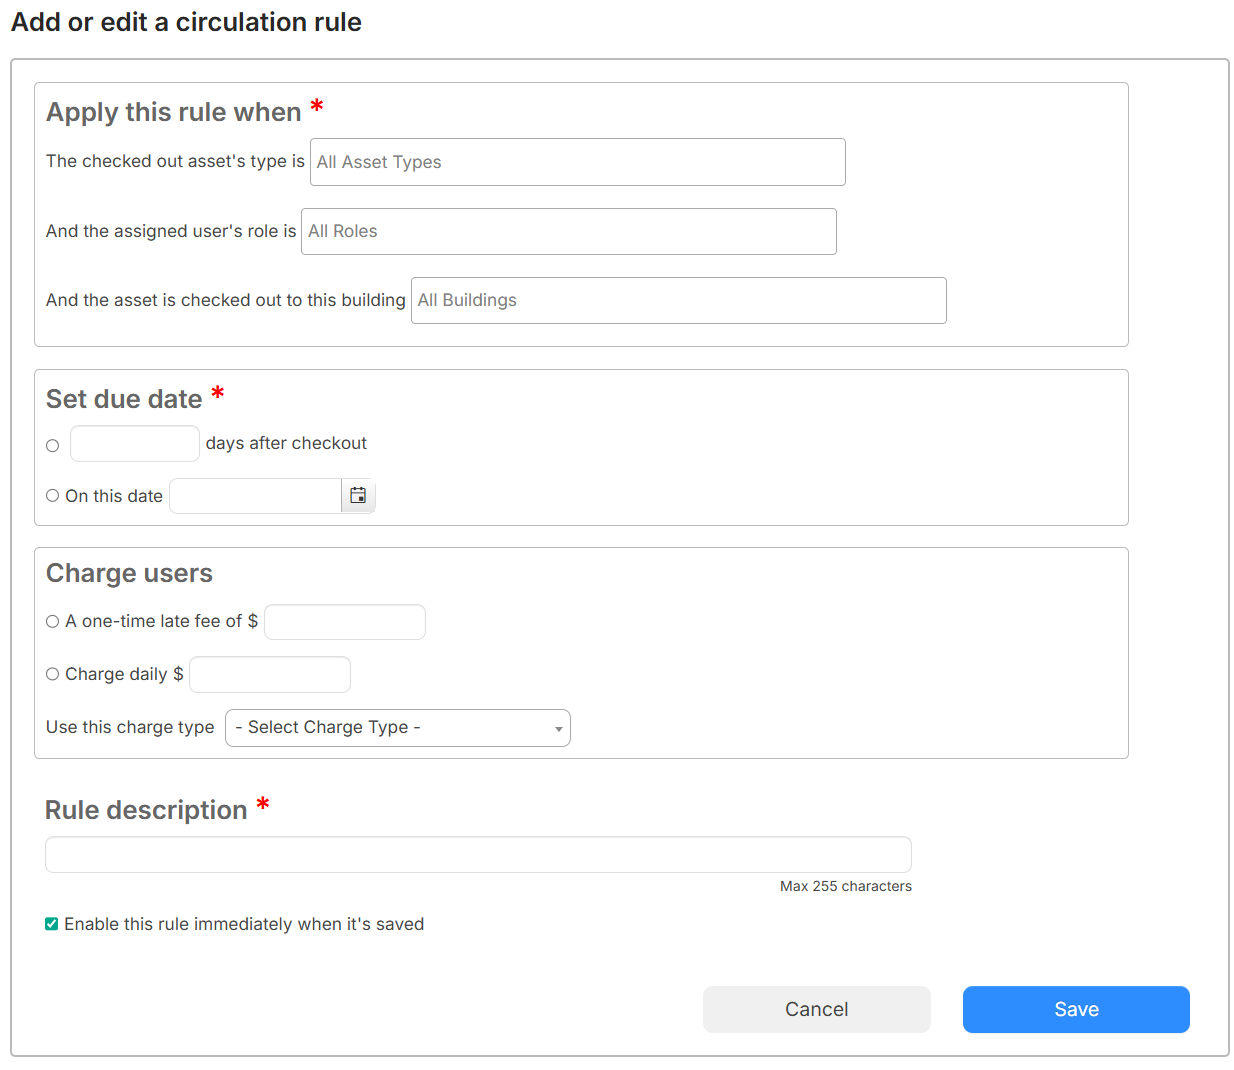
- In the Apply this rule when section, select one, two, or all of the following:
- Asset type(s)
Note: The drop-down displays only the asset types that can be checked out.
- Role of the user(s)
- Building(s)
- Asset type(s)
- In the Set due date section, select one of the following:
- days after checkout, and enter the number of days in the field.
- On this date, and enter the date or select it from the calendar.
- In the Charge users section, do the following (optional):
- Select either a one-time fee or daily charge, and enter the amount.
- From the Use this charge type drop-down, select the appropriate option.
Note: An automated nightly task runs to add charges. If you select a one-time fee, a charge is created the first day a resource is overdue. If you select daily charge, a charge is created every day until the asset is checked in.
- Enter a Rule description.
- To apply the rule right away, ensure the Enable this rule immediately when it's saved checkbox is selected.
- To automatically check in matching assets when the assigned user’s account is inactivated, select Automatically check in this asset if the assigned user is inactivated.
Notes:
- The asset status changes to Available and is unlinked from the user.
- The automatic check-in is recorded in the asset’s checkout history.
- The setting applies whether the account is inactivated manually, through a bulk update or import, or by an automated roster sync.
- Click Save.
If multiple rules apply during a checkout, the most specific rule applies.
To rank the rules:
- Click Rank Circulation Rule. A pop-up appears.
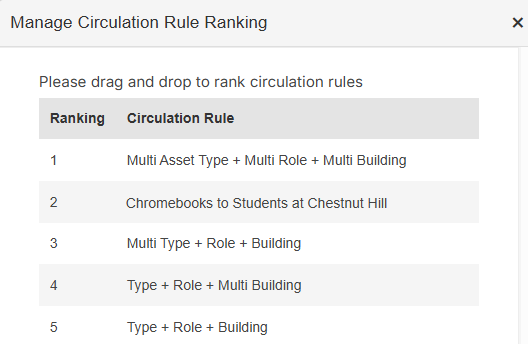
- Click a rule, and drag and drop it to the list position where you want it.
- When you are done, click
 to close the pop-up.
To disable a rule from being used:
- On the Circulation rules page, in the Enabled? column, select No from the drop-down for the rule you want to disable.
Note: If you disable a rule, it no longer applies to new checkouts, and no future overdue charges are created for existing checkouts associated with that rule. Due dates already set by this rule remain unchanged.
- Click OK on the pop-up.
To edit or delete a rule:
- Select Settings > Circulation Rules.
- Do one of the following:
To... Then... Edit a rule - Next to the rule, click
 .
. - Make the applicable changes.
- Click Save.
Delete a rule - Next to the rule, click
 .
. - On the message that appears, click Yes, delete.
- Next to the rule, click