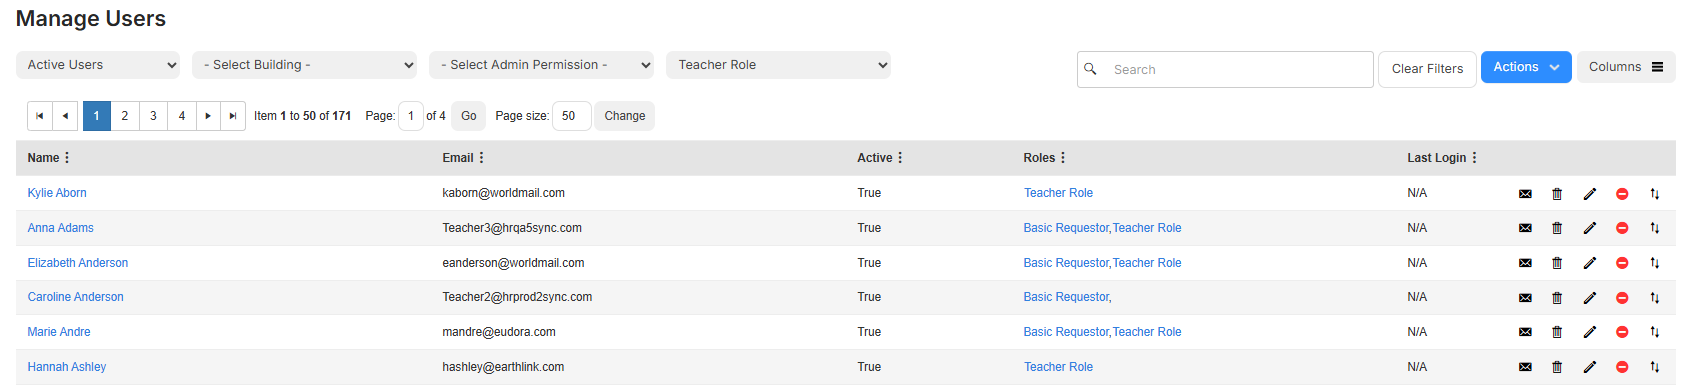
Manage users
The Manage Users page lets you add, edit, or delete a user, bulk inactivate users, bulk assign charges, and perform other actions. While you can create custom roles and assign appropriate permissions based on responsibility, administrative privileges can be configured at the user level. This gives districts control of visibility and management rights, so users only access data relevant to their department or responsibilities.
|
Example: For a user assigned a Staff role, administrative privileges can be restricted by: building, request type, system, asset type, inventory category, and inventory type. |
You can also set up which email notifications users receive, customize your view, and access the user's details.
- Log in with an Administrator account.
- Select Users > Manage Users.
- Select Actions > Add User. The Manage User page appears.
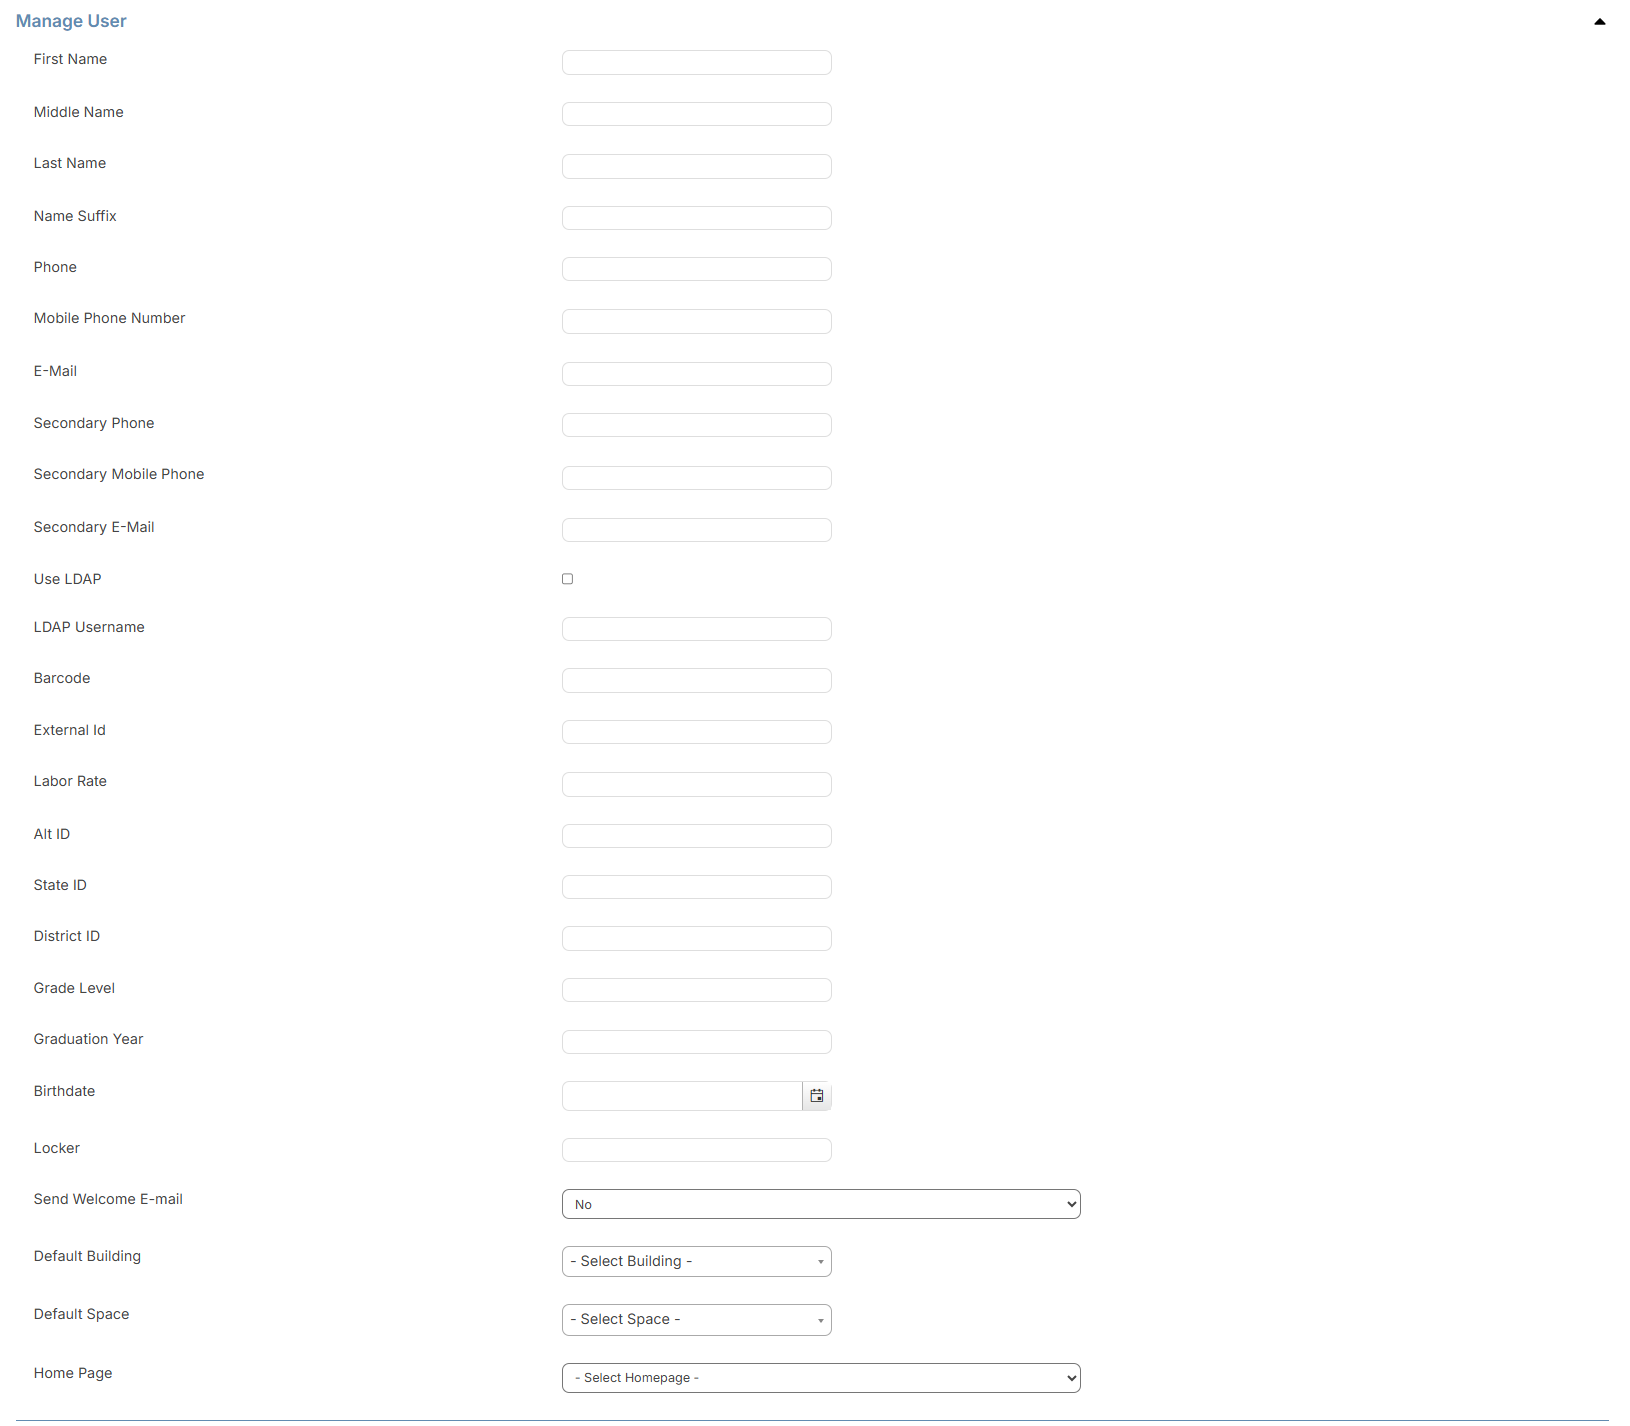
- In the Manage User section, do the following:
- Complete the First Name, Last Name, Phone, and E-Mail fields.
- To enable LDAP, select the Use LDAP checkbox.
- Enter the LDAP Username in the field, if known.
- Enter a Barcode for the user.
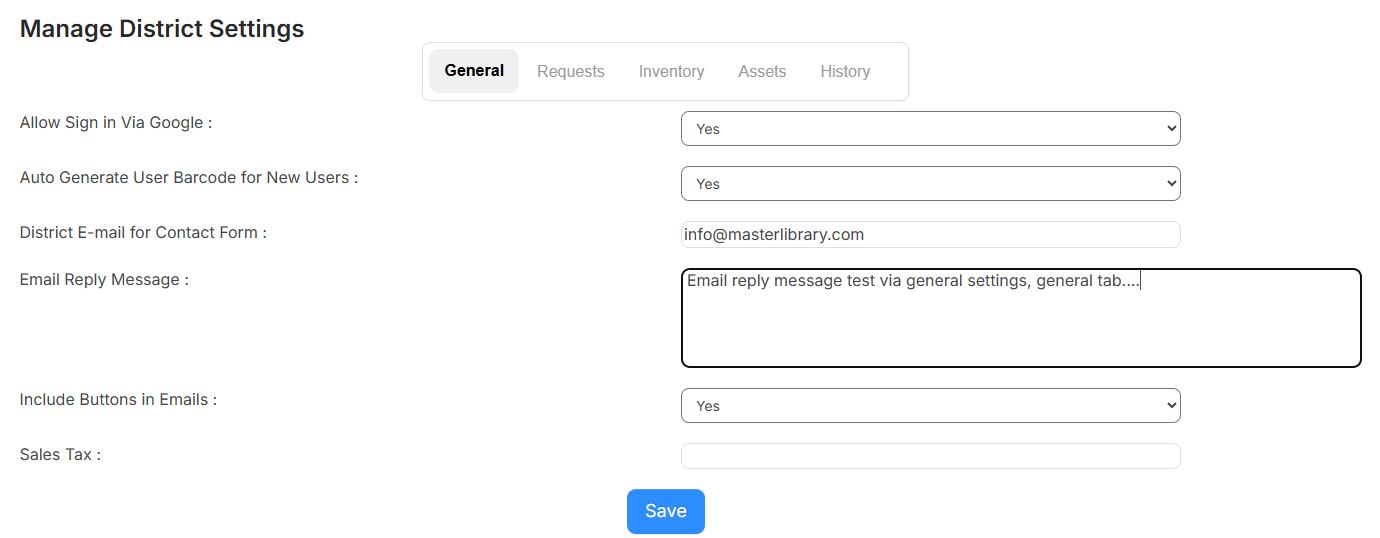
Note: If the Auto Generate User Barcode for New Users setting (in General Settings) is turned on, you can leave this field blank and it will populate. Auto-generated barcodes are 10 characters, start with a 3, and can contain numbers, uppercase letters, and the following characters: minus (-), plus (+), period (.), dollar sign ($), slash (/), and percent (%).
- In the External Id field, enter manually or sync from the following single sign-on options:
- Google SSO: EmployeeID field from Google
- SAML Google: EmployeeID field from SAML Google
- SAML Azure: EmployeeID field from SAML Azure
- SAML Okta: EmployeeNumber from SAML Okta
- In the Labor Rate field, enter the user's hourly labor rate.
- To Send Welcome E-mail, select Yes from the drop-down.
- Select a Default Building.
- Select a Default Space.
- Select a Home Page.
- In the Addresses section, do the following:

- Click + Add Address. The Add Address pop-up appears.
- Complete all applicable fields.
- If this is the main address for the user, select Primary Address.
- Click Add.
- Add secondary addresses as needed.
- In the Roles section, do the following:

- Click + Add Role.
- Select the applicable role from the drop-down.
- Use the Building, Request Types, Systems, Asset Types, Inventory Categories, and Inventory Types multi-select drop-downs to select applicable data.
- Click
 .
.
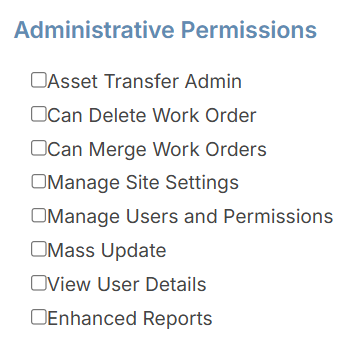
- Select which Administrative Permissions you want the user to have.
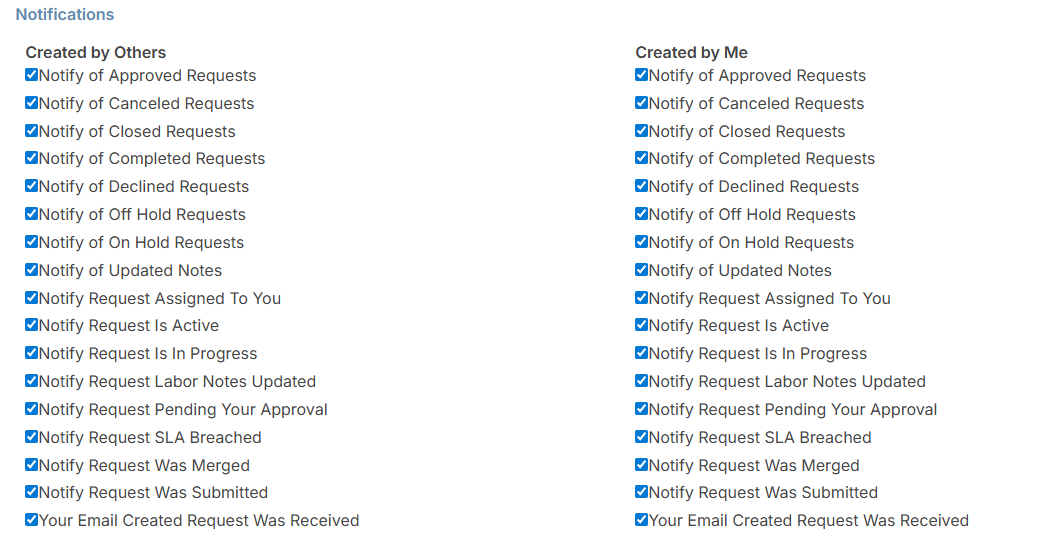
- Select which email Notifications you want the user to have.
- Click Save.
|
Note: If you add the Create Method column to the Manage Users page, the column shows when a user is created in any of the following ways:
Users added after the 25.6 release will show the create method. Users created prior to 25.6 will show N/A in the column. |
- Log in with an Administrator account.
- Select Users > Manage Users. The Manage Users page appears.
- Do any of the following:
To... Then... Send a welcome email - Click
 .The Send Welcome E-mail page appears.
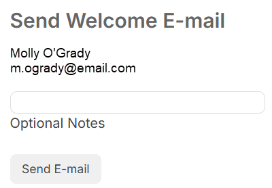
- Enter an optional note, if desired.
- Click Send E-mail.
Delete a user - Click
 . A confirmation pop-up appears.
 - Click OK.
Note: The delete icon will not appear if a user is:
- Associated with past requests
- On an approval path setup
- On an approval path for a request
- Associated with request notes
- On auto-assignments
- Assigned to a request
Your only option in these cases is to inactivate the user.
Inactivate a user - Click
 .
. - To see an inactive user, change the user status drop-down to Inactive Users.
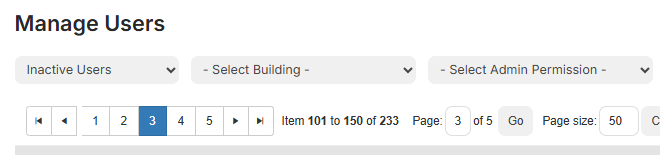
In the Active column, the user's status shows False.
Notes:
- You cannot inactivate a user if they are on an approval path for requests with a status of pending or if they are on an auto-assignment.
- Inactive users do not appear on the Manage Users page. You can view or reactivate an inactive user.
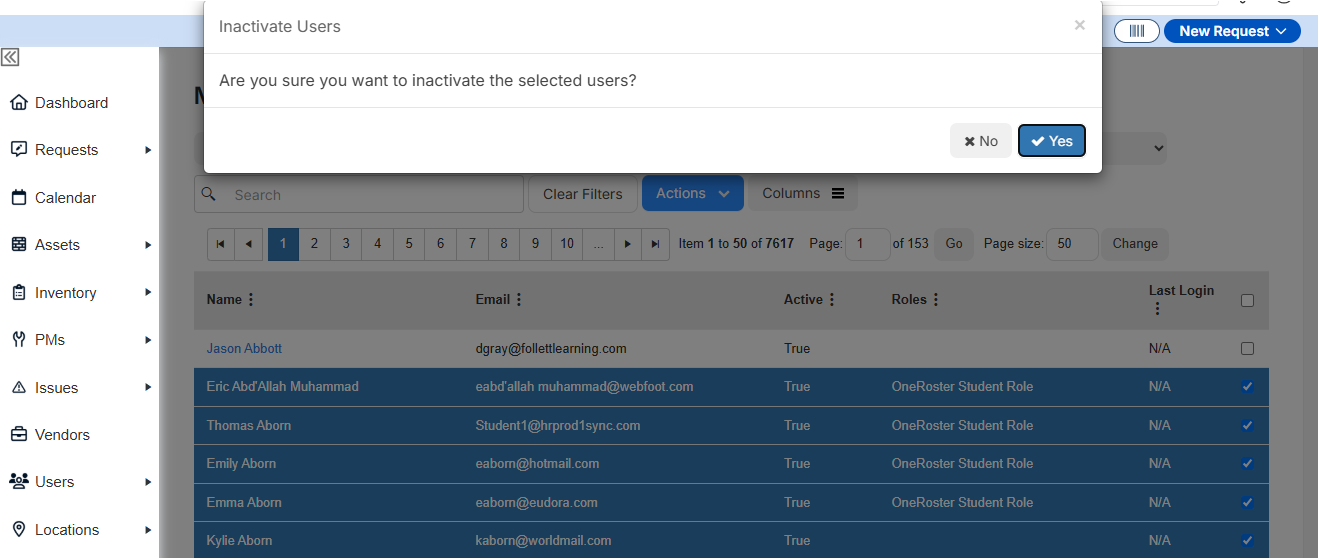
Bulk inactivate users Change the user status drop-down to Eligible to Inactivate.
In the last column, select the checkboxes for the users you want to inactivate.

Select Actions > Inactivate Selected Users.
On the confirmation pop-up message, click Yes.
Re-activate a user - Change the user status drop-down to Inactive Users.
- Click
 .
. - At the bottom of the page, click Activate.
Bulk assign charges - In the last column, select the checkboxes for the users you want to assign a charge to.
- Select Actions > Assign Charges. The Charges pop-up appears.
Note: You will only see this if you have the Manage Charges permission.
- Select the Charge Type from the drop-down.
- If you need to add more users, click in the User(s) to be Charged field and start typing their name or scroll through the list.
- Enter any of the following:
- Full Charge Amount
- Waive Amount
- Total Amount
- Payment Amount
- Add Notes.
- Click Save.
Edit a user - Click .
- Make any desired edits.
- Click Save.
Replace a user - Click
 .
. - Use the drop-down to select the replacement user.
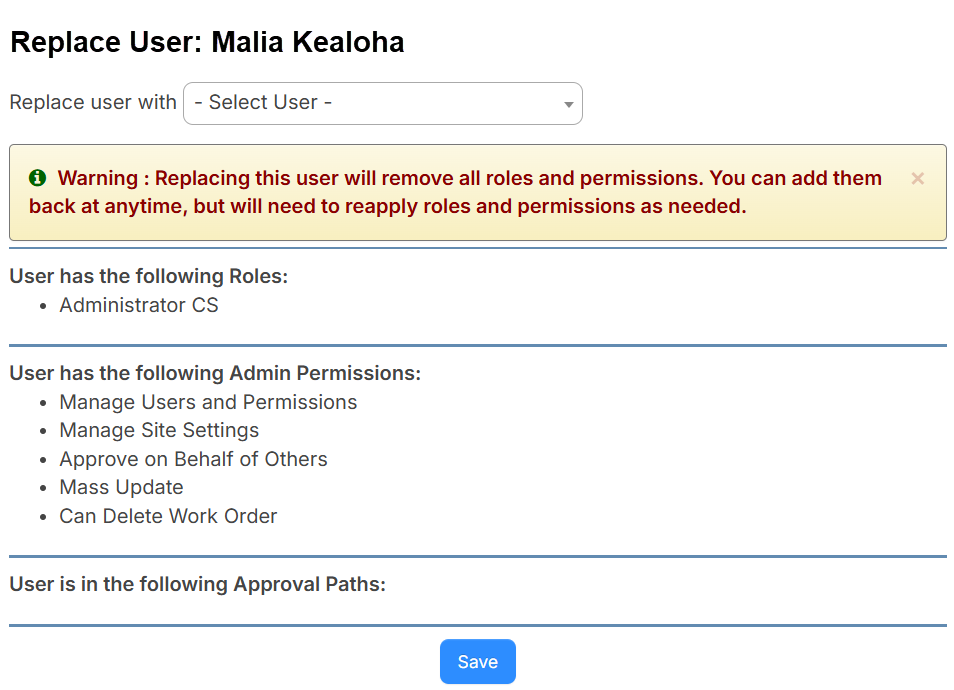
- Click Save.
- Click
User details page
The user details page lets you see a user's information, including their role and request submission history.
You must be an Administrator with either View User Details or Manage Users and Permissions administrative permission to access this page.
To access the user details page:
- Log in with an Administrator account.
- Select Users > Manage Users.
- From the Name column, select the name of the user you want to view.
To navigate the user details:
The user summary provides high-level information and quick access to actions you can take for the user you are viewing.
- The Roles tab has the following sections:
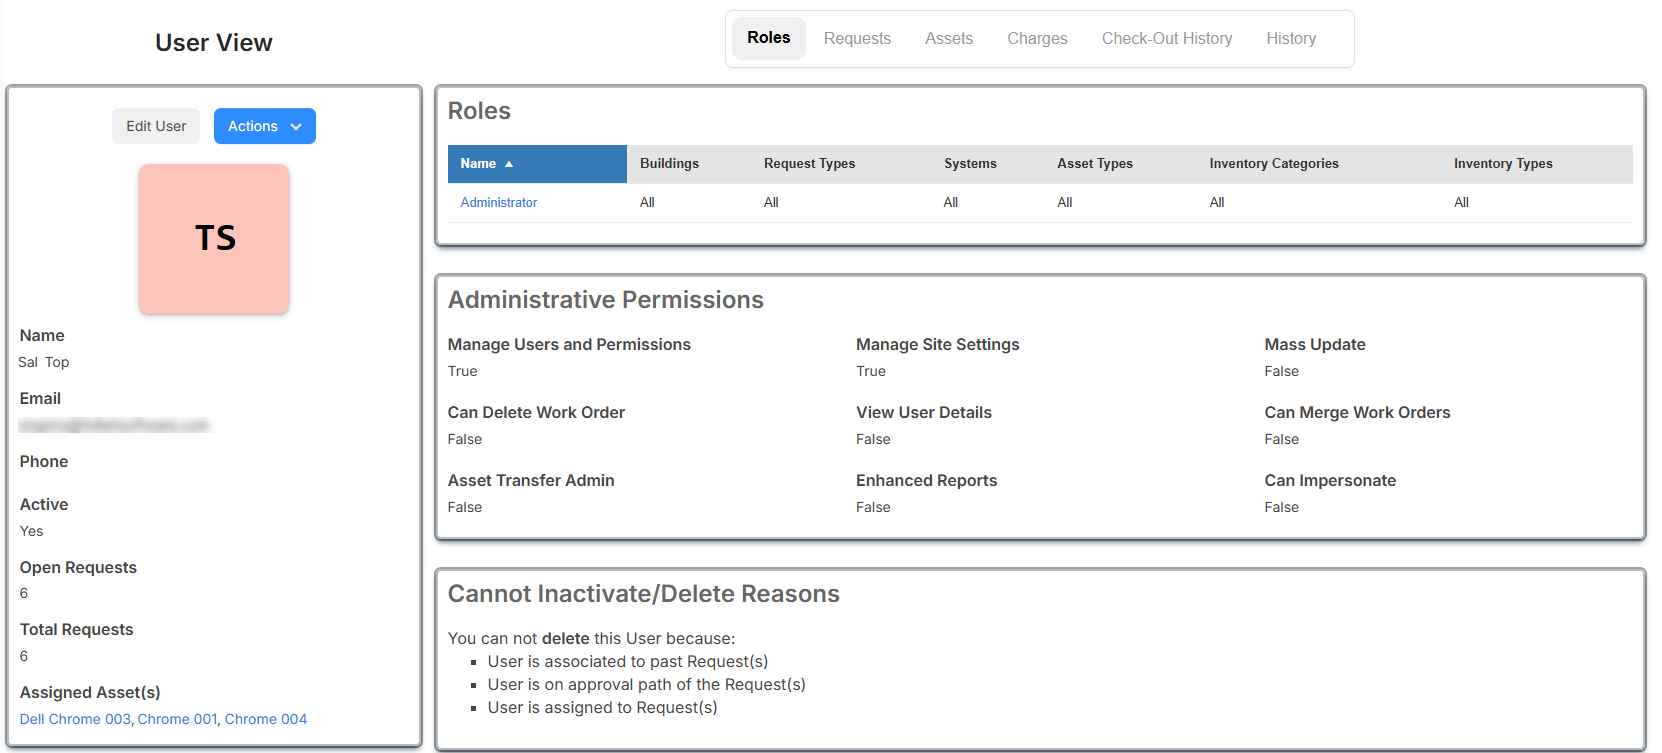
- User Details: See at-a-glance information about the user.
- Edit User: Lets an administrator user with the Manage Users and Permissions permission make updates to the record.
- Actions drop-down includes the following tasks:
To... Then... Submit Request The new request page appears. Check-Out Asset(s) The Asset Check-Out page appears.
- Choose how to search for the asset.
- Type or scan the asset's barcode.
- Select the checkbox to include Check-Out Component Assets.
- If the Check-Out Date is not the default of today's date, either type or use
 to select the date.
 - Enter a Due Date or use the .
- Enter any Notes.
- Select the checkbox to Send Confirmation Email.
- Click Check-Out.
Send Welcome Email A pop-up message appears letting you know a welcome E-mail was sent .
Replace User - Use the drop-down to select the replacement user.
- Click Save.
Inactivate User A pop-up confirmation message appears. Click Yes to inactivate the user.
Delete User A pop-up confirmation message appears. Click Yes to delete the user.
- Roles: See all the roles assigned to the user. Clicking a role will let you manage the permissions for that role.
- Administrative Permission: See the administrative permissions the user has, indicated by True, and those they do not, indicated by False.
- Cannot Inactivate/Delete Reasons: Lists reasons why you cannot inactivate or delete a user.
- User Details: See at-a-glance information about the user.
- The Requests tab shows Open, Closed, and All Requests, including requests submitted by or on behalf of the user.
- You can print PDFs of requests.
Note: The request content that appears is based on the logged-in user's role and permissions.
- The Assets tab shows assets assigned to the user. This tab only appears for a user with either the View Asset or Edit Asset permission.
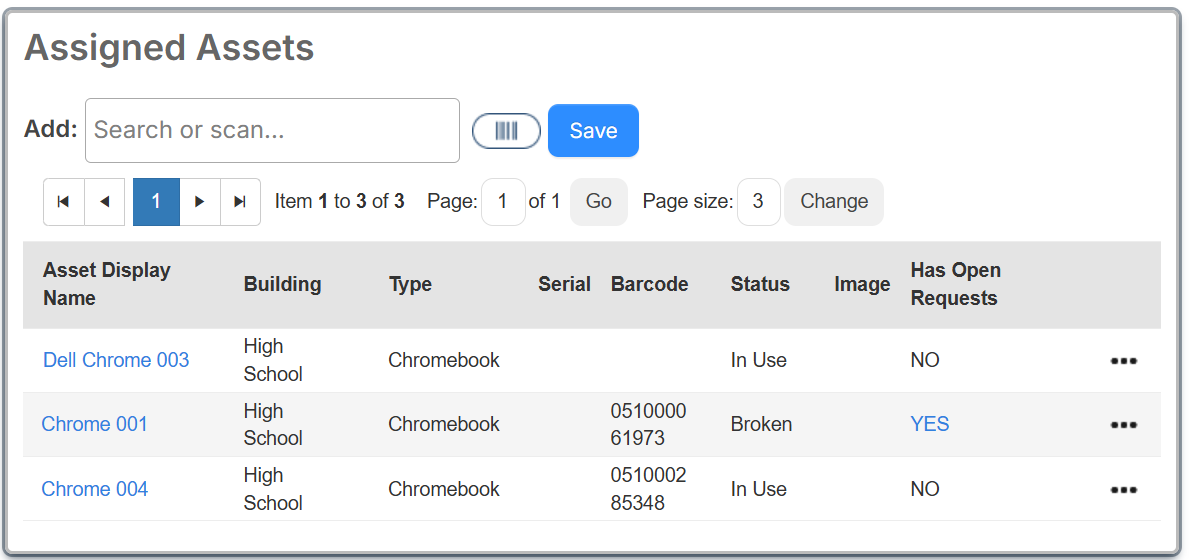
- To access the asset's details page, in the Asset Display Name column, click the asset link.
- If the asset Has Open Requests, click Yes to go to the request details page.
- Click
 to do one of the following:
To... Then... Submit Request The new request page appears. Check-In The Asset Check-In pop-up appears.
- Select the checkbox to include Check-In Component Assets.
- To change the asset's location, select the new location from the Change Space drop-down.
- If the Return Date is not the default of today's date, either type or use to select the date.
- Enter any Notes.
- Select the checkbox to Send Confirmation Email.
- Click Check-In.
- To assign an asset to the user you are viewing, in the Add field, type the asset's barcode or name, and then select it from the list. Or, use
 to scan the barcode. Click Save.
 Note: You need the Edit Assigned User asset permission on the asset to assign it.
- The Charges tab appears if you have either the Manage Charges or View Charges permission.
- The Check Out History tab appears if you have either View Asset or Edit Asset permission. This page shows a log of all current or previously assigned assets. The Asset Display Name link takes you to the asset record detail page.
- The History tab appears if you have the Manage Users and Permissions administrative permission. Use this tab to track all changes that occurred on the user account, including who, what, and when a change was made. You will see updates made to the role, fields, and administrative permissions.