Quick Circulation
Use Quick Circulation to check out or check in assets by selecting a circulation option, scanning a user barcode, and then scanning the assets. Without resetting the page, you can scan another user’s barcode to continue circulating assets.
To access the Quick Circulation page, you need the Edit Assigned User asset permission.
To access Quick Circulation:
Select Assets > Quick Circulation. The Quick Circulation page appears.
To enable circulation sounds:

Select Yes to turn on circulation sounds in the web app. These sounds alert you to:
- A successful checkout or check-in
- Errors and conditions that require attention, such as an unavailable item, an unrecognized barcode, or an item that cannot be checked in or out
- Items identified as overdue during check-in
|
Note: Audio feedback plays as soon as the scan result is available and does not delay scan processing. |
To check out assets:
- Select Check out.
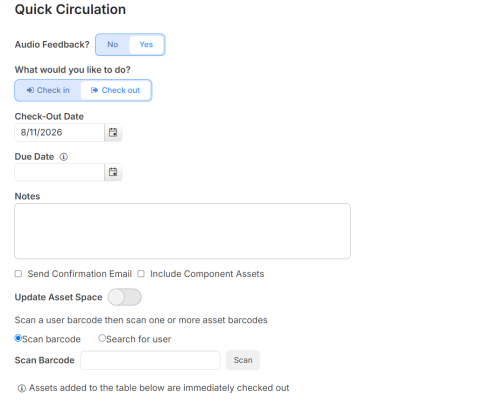
- To change the Check-Out Date, type the new date in the field or use the calendar icon to select it.
- To enter a Due Date, type the date in the field or use the calendar icon to select it.
Notes:
- Based on the General Settings for assets, this field may be required. If it is, a red exclamation point appears next to the field.
- If you manually enter a date and circulation rules are set for the asset being checked out, the applicable rule overrides the due date.
- Include any relevant Notes about the circulation transaction.
- To Send Confirmation Email or Include Component Assets, select the checkboxes.
- To change the space, select the Update Asset Space toggle and then choose one of the following:
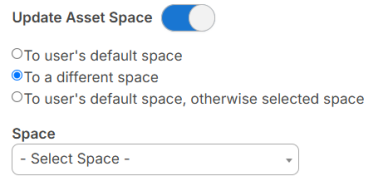
- To user's default space updates the asset to the specified user's default space.
- To a different space lets you select the new space from the drop-down.
- To user's default space, otherwise selected space uses the user's default space if one is in their record; if not, it uses the space you select from the drop-down.
- Do one of the following:
- Scan Barcode: Scan or type the user's barcode, and then scan the asset barcode (or type the asset name). If your scanner has a carriage return setting, the scan is done automatically; otherwise, click Scan.
Note: A message may appear letting you know you cannot check out an asset. This could be because the asset has a status such as In Use or Available for Parts.
- Search for User: Click the empty field, start typing the user's name, and select the user from the list. Then scan or type the asset name or barcode.
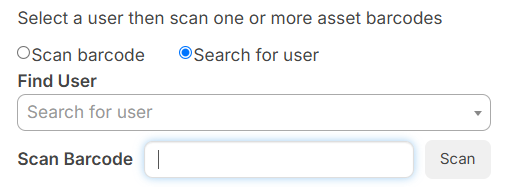
- Scan Barcode: Scan or type the user's barcode, and then scan the asset barcode (or type the asset name). If your scanner has a carriage return setting, the scan is done automatically; otherwise, click Scan.
|
Note: The check-out date, due date, and space settings persist across scans. |
To check in assets:
- Select Check in.
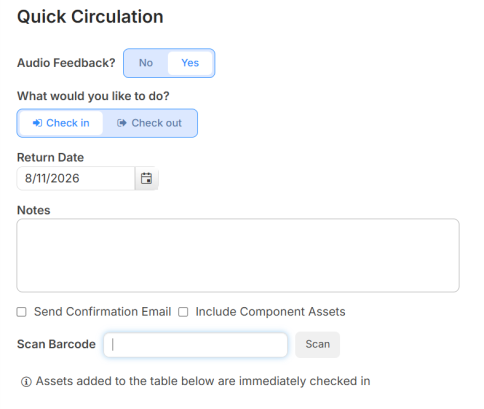
- Ensure the Return Date is correct; otherwise, type the date in the field or use the calendar icon to select it.
- Include any relevant Notes about the circulation transaction.
- To Send Confirmation Email or Include Component Assets, select the checkboxes.
- To create a charge, click Add Charge. The Add Charge for Checked In Assets page appears.
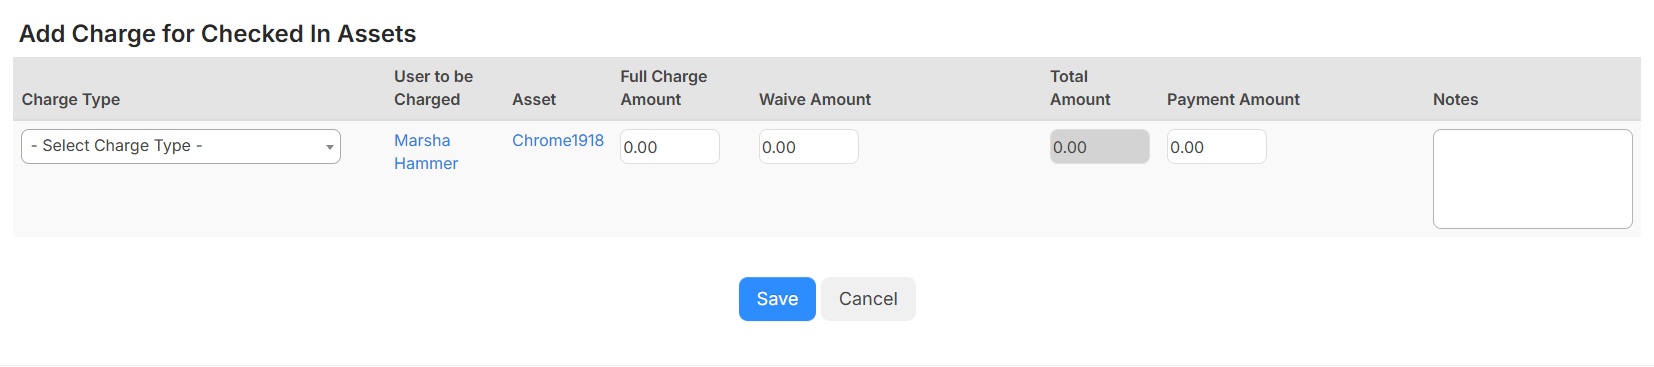
- From the drop-down, select a Charge Type.
- Enter the Full Charge Amount, Waive Amount, and Payment Amount.
- Add Notes.
- Click Save.
To continue checking assets out or in to a new user with the same dates, notes, and options, scan the user's barcode, and then scan the assets.
The following settings are saved when you leave and return to the page, even if you log out and back in:
- Check in vs. Check out
- Due Date, when populated
- Send Confirmation Email
- Include Component Assets
- Update Asset Space, and the associated selection