Circulate assets on asset detail page
With the Enter Asset on WOs and View Assets permissions, you can check out or check in assets, and view check out history.
To check out an asset:
- Select Assets > View All Assets. The Manage Assets page appears.
- Click the asset you want to check out. The asset details page appears.
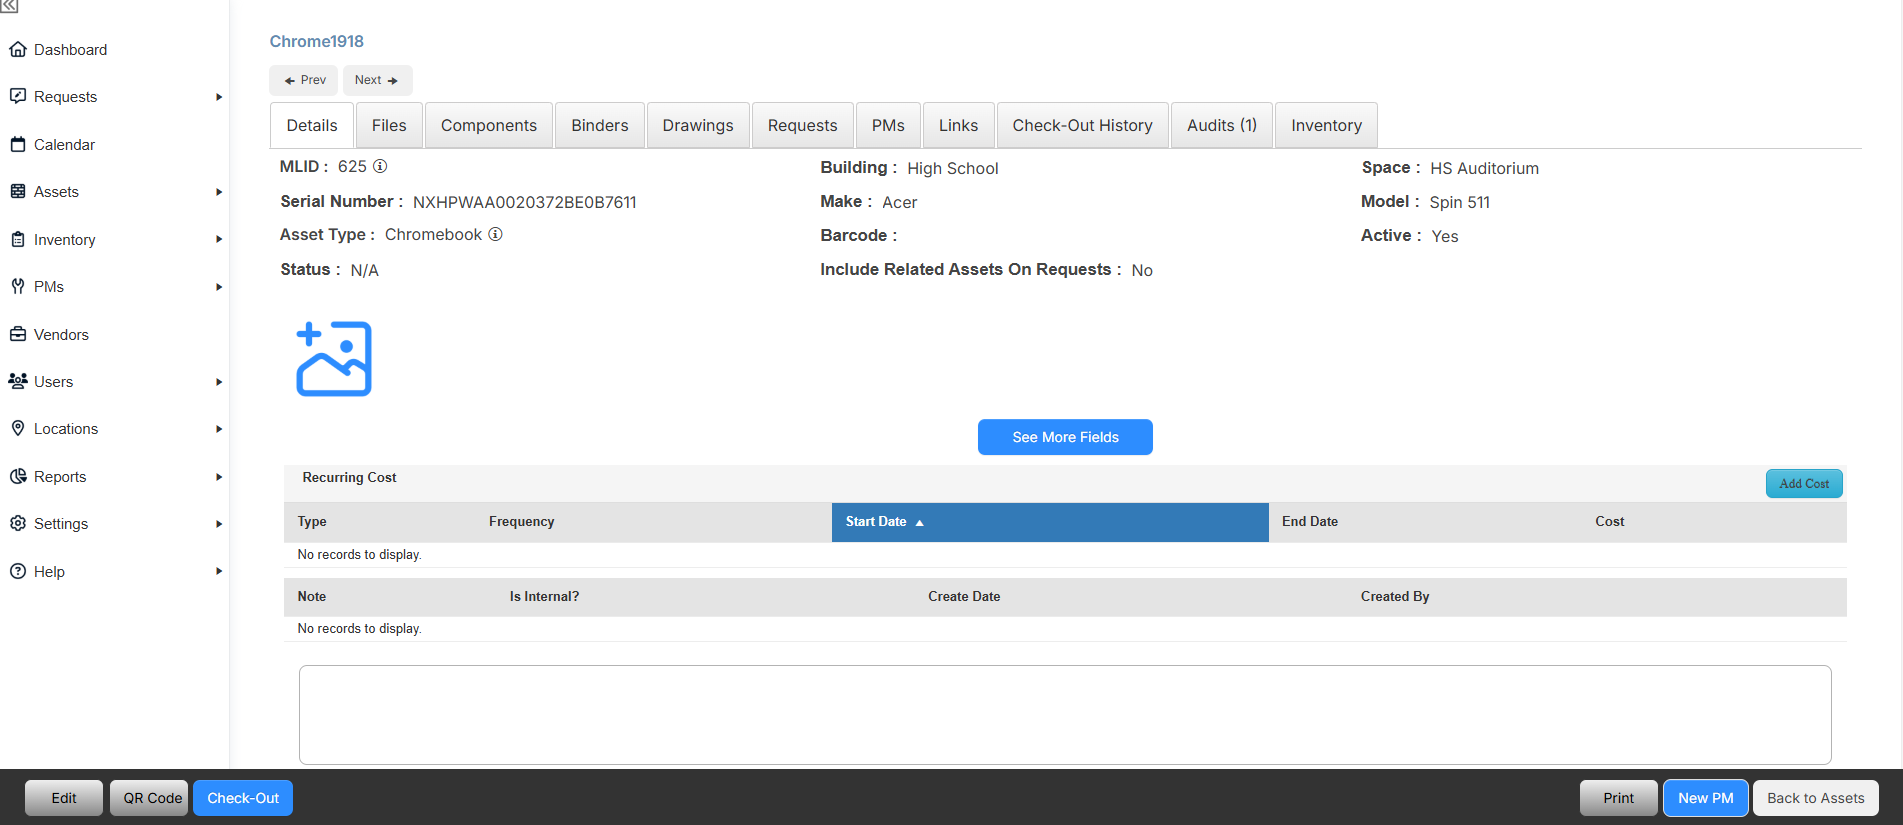
- At the bottom of the page, click Check-Out. The Asset Check-Out pop-up appears.
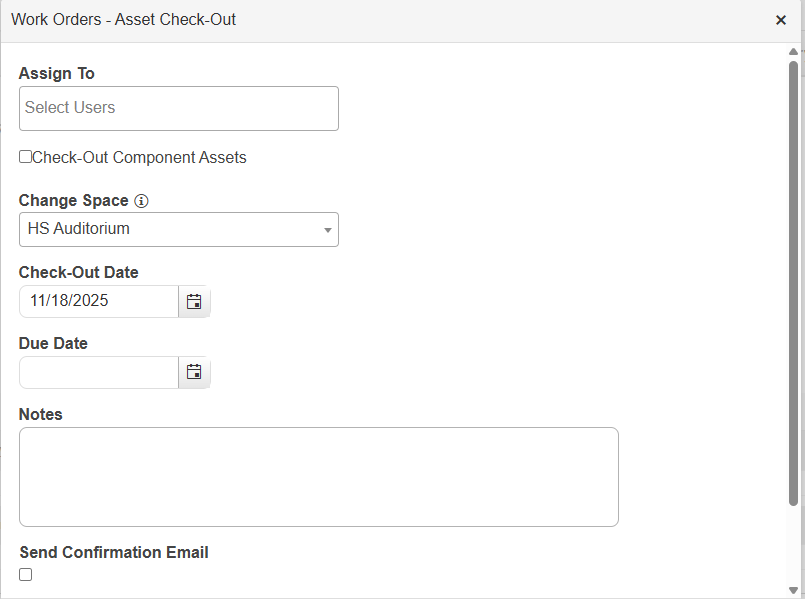
- In the Assign To field, search for a user by name, email address, or barcode, or scan their barcode.
- To check out related component assets, select the checkbox to Check-Out Component Assets.
- To update an asset's space, select an option from the Change Space drop-down.
- The Check-Out Date defaults to the current date. To change it, type the date or click
 .
. - To enter a Due Date, type the date or click .
- Add any Notes.
- To Send Confirmation Email to the user the asset is checked out to, select the checkbox.
- Click Check-Out.
- Click OK on the confirmation pop-up.
- Select Assets > View All Assets. The Manage Assets page appears.
- Click the asset you want to check out. The asset details page appears.
- At the bottom of the page, click Check-In. The Asset Check-In pop-up appears.
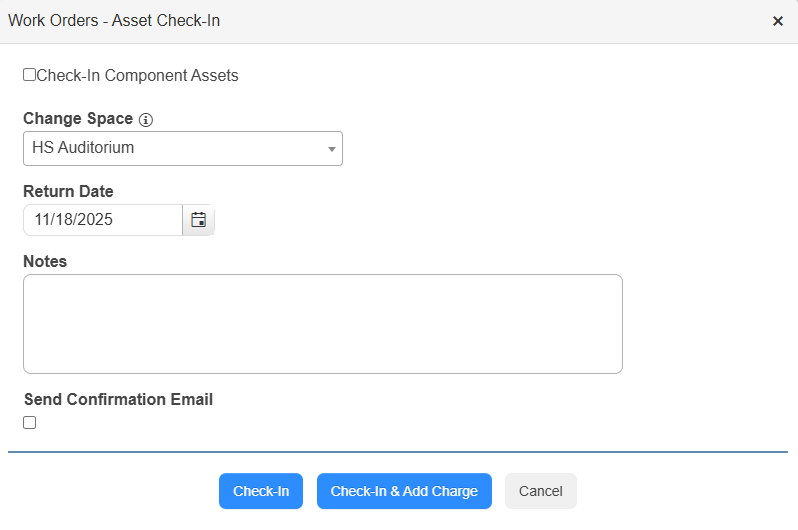
- To check in related component assets, select the checkbox to Check-In Component Assets.
- To update an asset's space, select an option from the Change Space drop-down.
- The Return Date defaults to the current date. To update it, type the date or click .
- Add any Notes.
- To Send Confirmation Email to the user the asset is checked out to, select the checkbox.
- Do one of the following:
- Click Check-In
- To check in and create a charge, click Check-In & Add Charge. The Add Charge for Checked In Assets page appears.
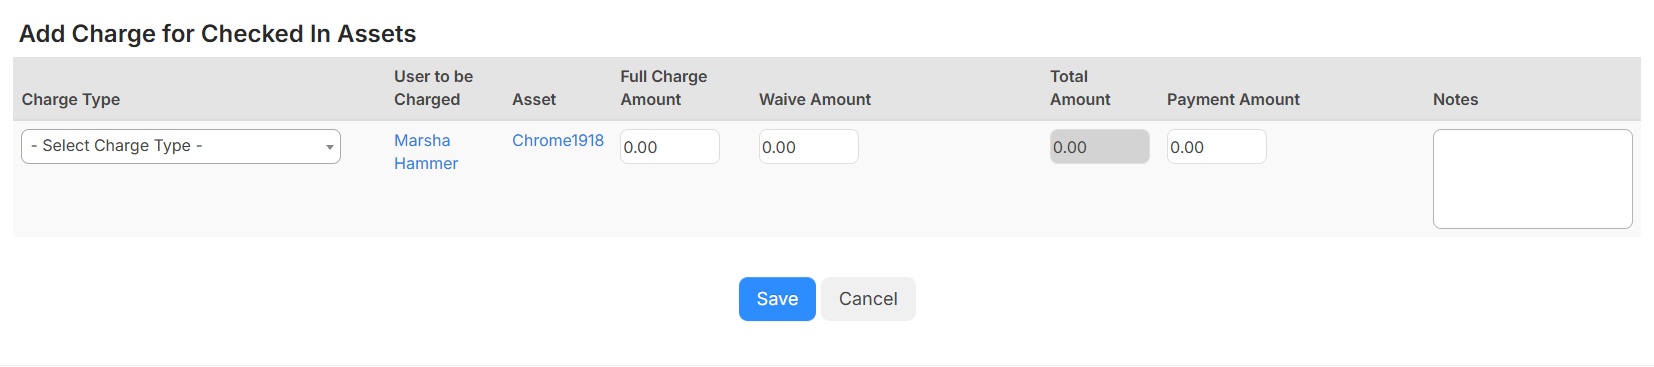
- Select a Charge Type from the drop-down.
- Enter the Full Charge Amount, Waive Amount, and/or Payment Amount.
- Add Notes.
- On the confirmation pop-up, click OK.
- Click OK on the confirmation pop-up.
- Select Assets > View All Assets. The Manage Assets page appears.
- Click the asset you want to view the checkout history for. The asset details page appears.
- Select the Check-Out History tab.