Manage subtasks on a request
Subtasks let you break a request into smaller, trackable work items. On a parent request, the Subtasks tab shows all related subtasks. Any subtask marked as required must be completed before the parent request can be closed.
|
Examples:
|
Subtasks use the same permissions, notifications, and related tab functionality as requests.
To add a new subtask for a request:
- Search for the desired request.
- Next to the one you want, click the Request ID number.
- On the request details page, click the Subtasks tab.

- Click + Create Subtask.
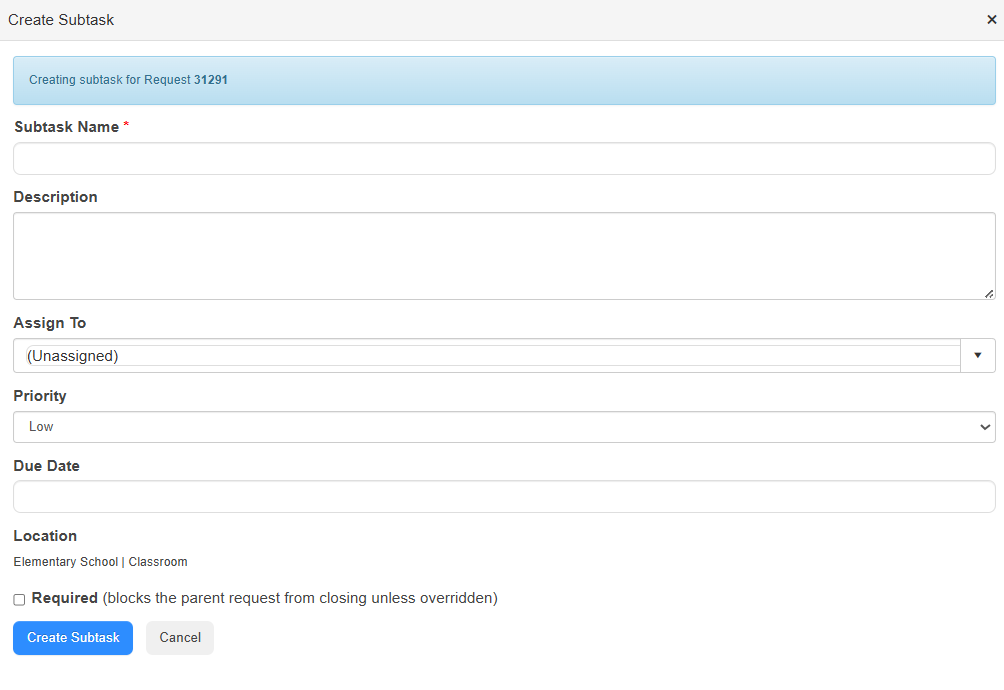
- Enter a unique Subtask Name.
- Do any of the following:
- Enter a Description.
- From Assign to, select the person responsible for completing the subtask.
- Select a Priority.
- Click the Due Date field, and select a date from the calendar.
- Select the checkbox to mark the subtask as Required.
Note: If someone tries to complete a request that has a required subtask that is not complete, a message appears. The user can either override the subtask and complete the request or complete the subtask first.
- Click Create Subtask.
To view and manage subtasks, including changing the status:
To view subtask details, click the subtask ID on the Subtasks tab of the request details page.

The subtask details page appears.
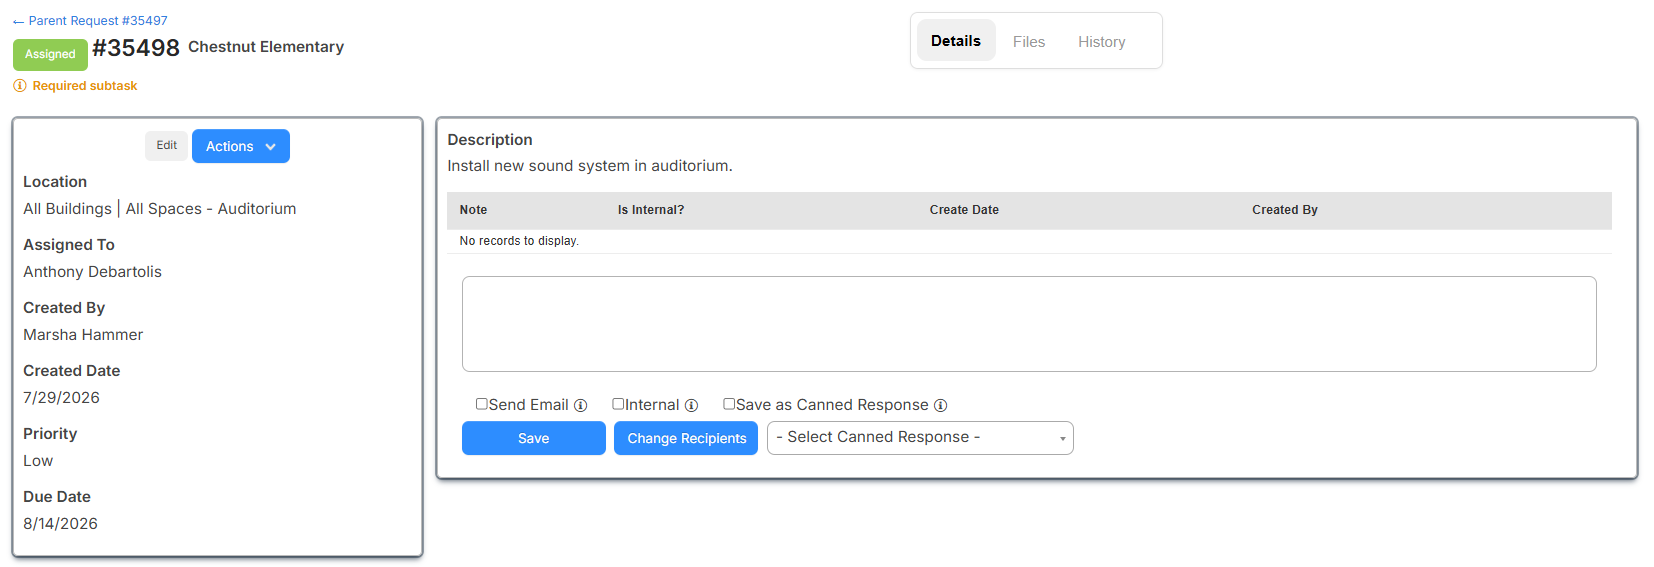
Do any of the following on the subtask details page:
| If you want to... | Then... | ||
|---|---|---|---|
|
Update the subtask status, including approving and assigning subtasks
|
Click Status, and select the applicable status.
|
||
|
Edit the subtask
|
|
||
| Print the subtask details |
|
||
| Print the work form |
|
||
|
Delete the subtask
|
|
||
| Return to the request list | Select Actions > Home. | ||
| Add a note |
|
||
| View, add, or delete files |
|
||
| View history | Select the History subtab. | ||
| Return to the parent request | Click the parent request link at the top of the subtask details page. |
 .
.