Mass update requests
Users with the Mass Update administrative permission can update and assign multiple requests at once, including adding notes.
|
Important: Mass update cannot be undone. |
To mass update requests:
- Select Requests > View All Requests. The All Requests page appears.
Note: You can also mass update requests from Requests > My Requests, My Open Assignments, My Closed Assignments, Open Requests, Closed Requests, and Pending My Approval.
- Find a request by searching or using a filter(s).
Note: To view all requests, in the column of your choice, click . In the filter () section, select Check All, and then click Filter.
-
Do one of the following:
- In the row of each of the requests you want to mass update, select the checkbox.
- To select all items on a page or all items across all pages, click at the top of the Select all column.
Notes:
After you click the drop-down (), a banner at the top of the page indicates the number of items selected. To remove the selection, click Clear in the banner.
You cannot mass update assets that are In Transit. You will not see a warning message to this affect when you select records, but the record count will not match the original number of records selected.
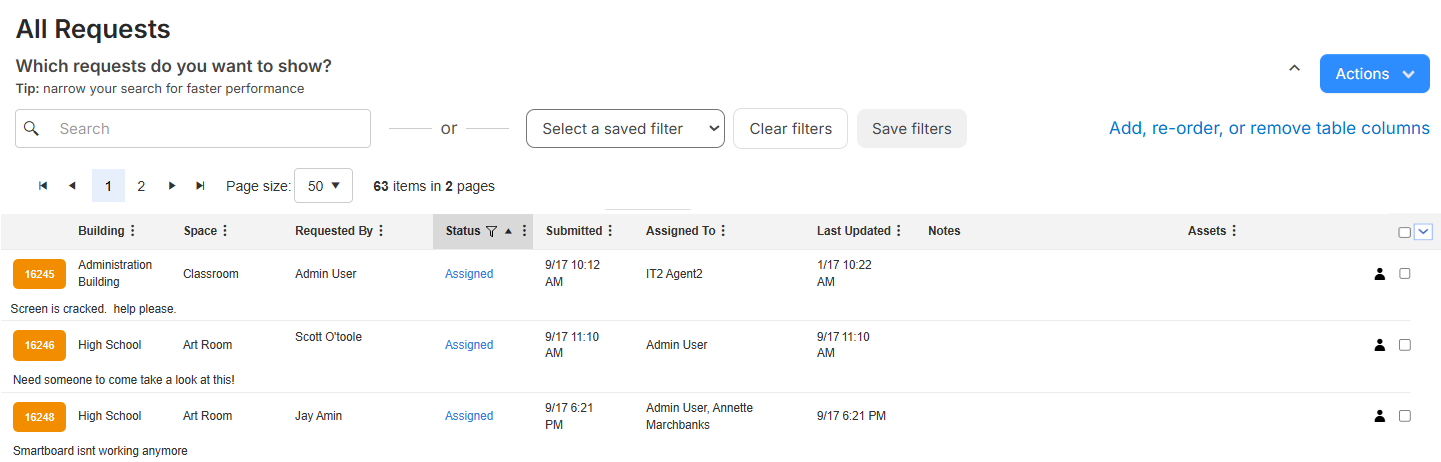
- Select Actions > Mass Update.
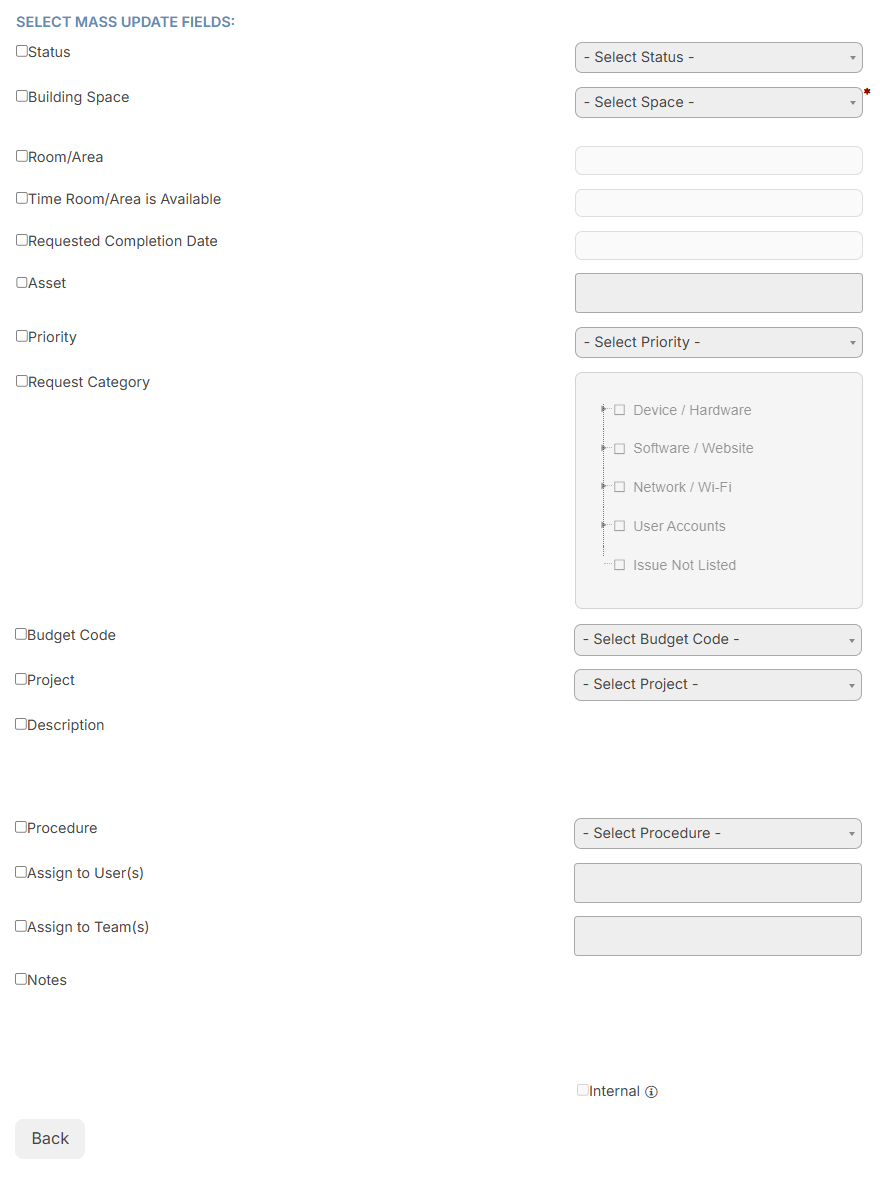
- Next to each field you want to mass update, select the checkbox, and update the field.
Notes:
- The Request Category field is not available if the request type is using the single-form page.
- If you select the Request Category checkbox:
- If a field was in the old category and is in the new category, that field and data are kept in the request.
- If a field was in the old category and is not in the new category, that field and data are deleted from the request.
- If you select the Assign To User(s) or Assign To Team(s) checkbox, only users or teams that can be assigned requests appear.
- If you add Notes, you can limit the note to administrator users by selecting the Internal checkbox. An email is sent to all applicable users from the selected requests.
- Click Next. The Confirm Mass Update page appears.
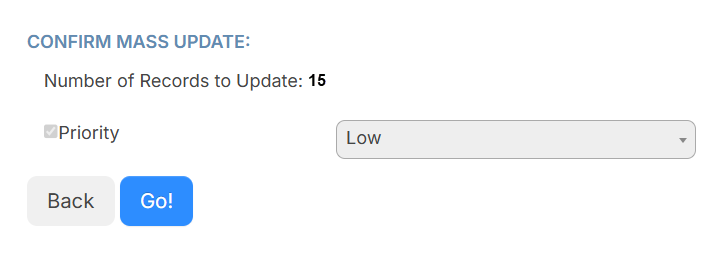
- If desired, update the priority.
- Click Go!. A confirmation pop-up appears.
- Click OK.
The Mass Update status changes to Success when it is complete.
There are additional options on the All Requests page that allow you to customize your view.