Integrate with Azure (SAML)
Users with the Manage District Settings user permission can set up single sign-on with Azure. The SAML Azure integration is the recommended SSO option for Microsoft users.
This integration creates user accounts as users log in for the first time. It gives users the option to 'Login with Microsoft'.
This is a three-step process:
- In Azure, add a new SAML application.
- In IT Asset Manager, set up your Identity Provider.
- Set default roles for IT Asset Manager users who log in via SAML.
|
Important: Because of the technical knowledge required, your district's IT administrator will most likely need to perform this procedure. |
Step 1: In Azure, add a new SSO application
In Azure (https://portal.azure.com/), you will add a new SSO Connection. A few things to take note of while setting up Azure:
- Fields are case sensitive.
- In Microsoft Entra ID, you need to create your own application (under Add > Enterprise application):
- Enter a name that identifies it as IT Asset Manager.
- You must select Integrate any other application you don't find in the gallery (Non-gallery).
- Set up single sign-on for SAML.
- Edit the Basic SAML Configuration. Add an Identifier (Entity ID) and Reply URL.
Note: The Identifier and Reply URL should be https://XXXXX.mlworkorders.com/MLSAMLConnect.aspx. Replace “XXXXX” with your custom IT Asset Manager subdomain.
- Edit the Basic SAML Configuration. Add an Identifier (Entity ID) and Reply URL.
- Edit the Attributes & Claims.
You need to map four new attributes. Add a new claim, and enter the text exactly as follows:
- Name: FirstName
Source attribute: user.givenname - Name: LastName
Source attribute:user.surname - Name: Email
Source attribute: user.mail - Name: ExternalID
Source attribute:user.employeeid
- Name: FirstName
- Add a group claim. Either add all groups or groups assigned to the application.
Note: These are the groups you will pass to IT Asset Manager. This will then automatically assign users role(s) in IT Asset Manager.
- Ensure the Source attribute is Group ID.
- In Advanced options, click Customize the name of the group claim, and enter the Name as Group. Select either all or a specific group to pass through to Roles in IT Asset Manager.
- Edit the SAML Certificate for IT Asset Manager. Next to the active certificate, download the Base64 certificate.
- Assign users and groups that you want to have access to IT Asset Manager.
|
Note: Azure’s interface and field names may have changed since this was written. Use these steps as a general guide, and select the closest matching options in your Azure portal. |
Step 2: In IT Asset Manager, set up your Identity Provider
- Select Settings > Single Sign On > SAML Configuration. The SAML Integration Admin page appears.
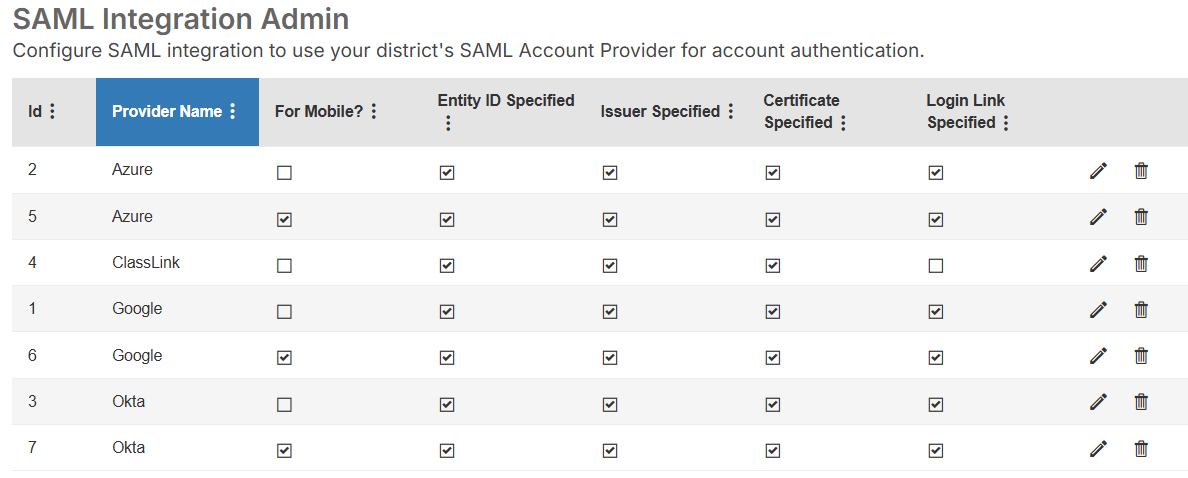
- Next to Azure, click . A pop-up appears.
Note: You may see two rows for Azure, one with a checkbox in the For Mobile column and one without a checkbox in that column.
To set up the web app, select in the row without the For Mobile checkbox selected.
To set up the mobile app, select in the row with the For Mobile checkbox selected.
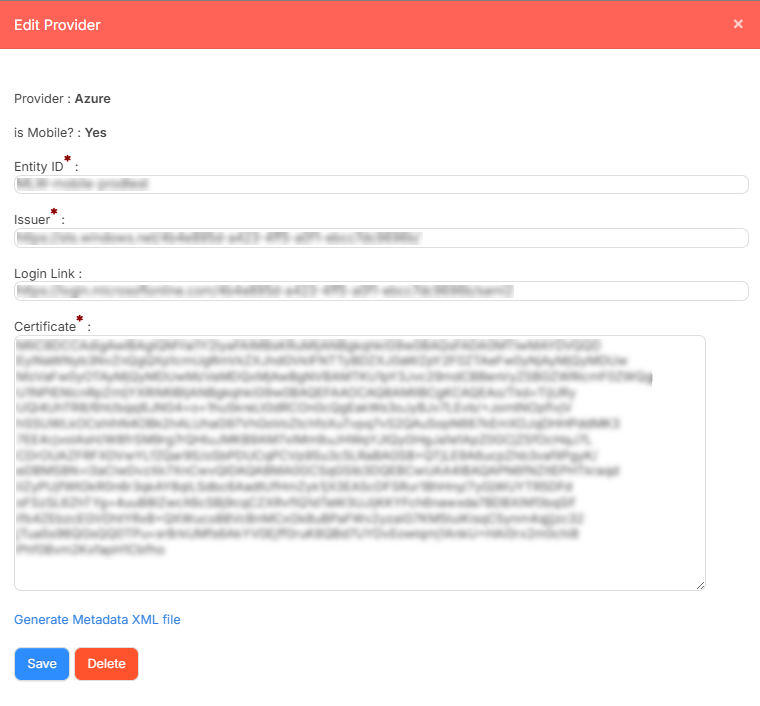
- Do the following:
- Under Entity ID, enter your Azure Identifier (Entity ID).
- Under Issuer, enter the Microsoft Entra Identifier.
- Under Login Link, if desired, enter the User Access URL from the Azure Properties.
- Under Certificate, enter the IdP signing certificate from the Entra SAML configuration.
Notes:
- You downloaded this from Azure. Enter it here.
- On the certificate, remove ---Begin Certificate--- and ---End Certificate---.
- Click Save.
Step 3: Set default roles for IT Asset Manager users who log in via Azure
|
Note: You can create as many SAML groups as you want. When a user first logs in, they are assigned a role based on the group they belong to. You can also manage additional roles in IT Asset Manager, but cannot remove these default roles. |
- Select Setting > Single Sign On > SAML Group Settings. The Manage SAML Groups page appears.
- Click +Add SAML Group. A pop-up appears.
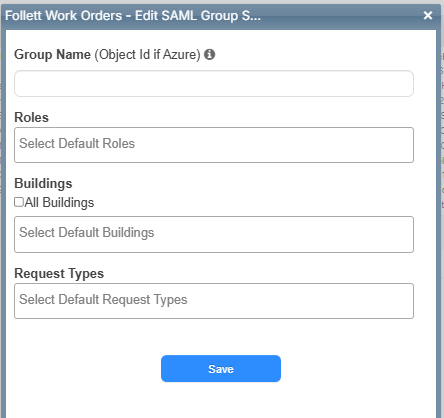
- Do any of the following:
- Enter a Group Name.
Note: This is the Object ID specific to the Azure group you are setting up.
- Select the desired Roles.
- Select the desired Buildings.
Note: To select All Buildings, select the checkbox.
- Select the desired Request Types this group can access.
- Enter a Group Name.
- Click Save.
- Repeat steps 2-4 for each group you want to add.