Import assets
With the Can Import Assets permission, you can import assets from an Excel file using the Import Wizard. This lets you add and maintain asset data without adding or updating each record manually.
Before you begin
Prepare an .xlsx file with the asset information you want to import. Keep the following in mind:
- Asset Name, Asset Type, Building, and Space are required fields.
- The Asset Name must be unique.
- When creating check-out records, the Check-out Date is required.
- Circulation rules do not apply to assets checked out with the upload.
- You cannot use the upload to check in assets or delete checkout records.
- You can create your own spreadsheet or download a template.
|
Notes:
|
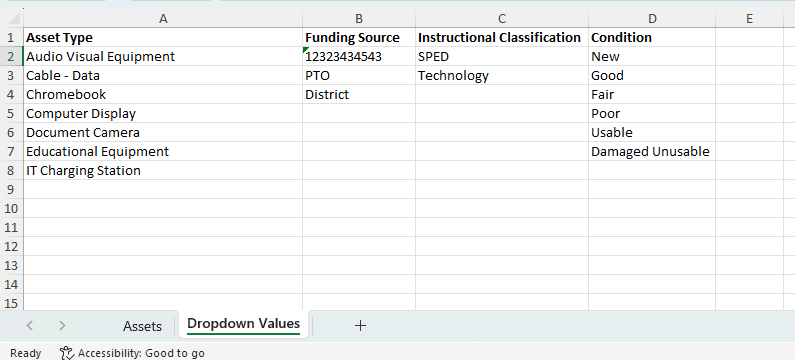
To use the Import Wizard:
- Select Assets > Asset Import. The Import Wizard appears.
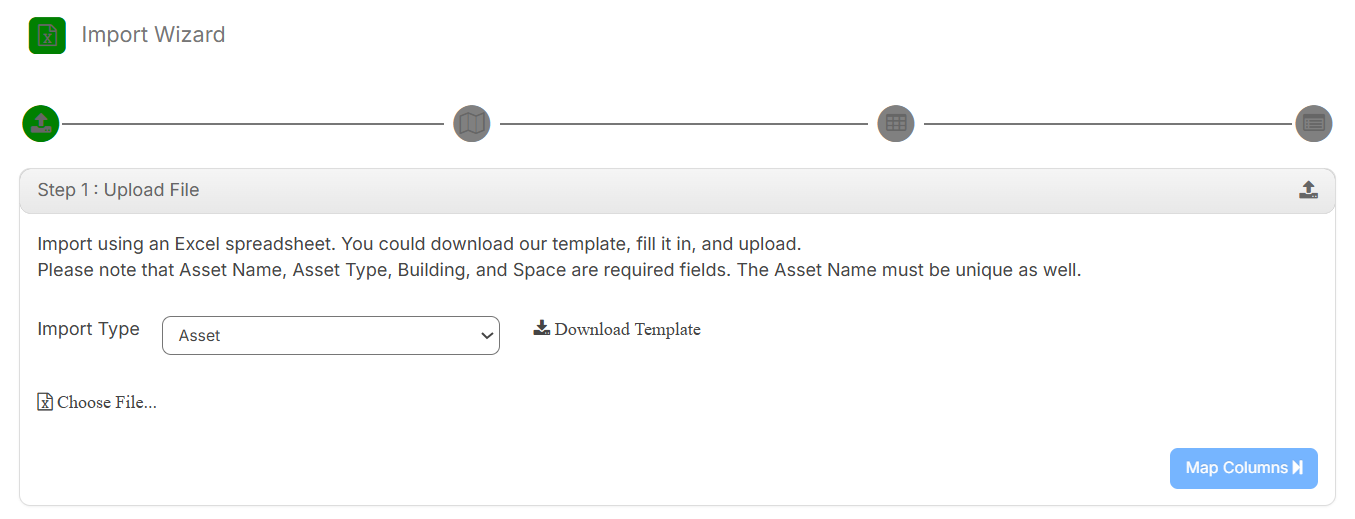
- From the Import Type drop-down, select Asset.
- To use the template file, click Download Template.
- Under Import Option, do one of the following:
- To import new asset records, select Create New Assets.
- To Generate Barcode for Assets, select Yes.
- To import updates for existing assets, select Update Existing Assets.

- From the Specify matching column drop-down, select how you want to match existing assets.
Note:
- Assets are matched by their Barcode, Serial Number, or MLID.
- To import assets using the MLID, export asset data from View All Assets or View All Assets (all fields). Include MLID as a column in the import file, and map that column to Asset ID. IT Asset Manager automatically associates each value with the corresponding asset.
- From What should happen when the uploaded field is blank, select one of the following:
- Keep the existing value – leaves the current value unchanged when the corresponding spreadsheet cell is blank.
- Delete the existing value – clears the existing value when the corresponding spreadsheet cell is blank.
- From the Specify matching column drop-down, select how you want to match existing assets.
- To import new asset records, select Create New Assets.
- To Create check-out records for the Assigned To user, select Yes.
Note: If the Assigned To field contains more than one user AND you select this option, the asset is assigned to the first user in the list.
- If you are uploading assets that are assigned to users, select the format for the Assigned To field from the User format in the file drop-down.
- To upload the file, click Choose File, select the file, and then click Open.
- Click Map Columns.
- Use the drop-downs to select the ITAM fields that correspond to the columns in the spreadsheet.
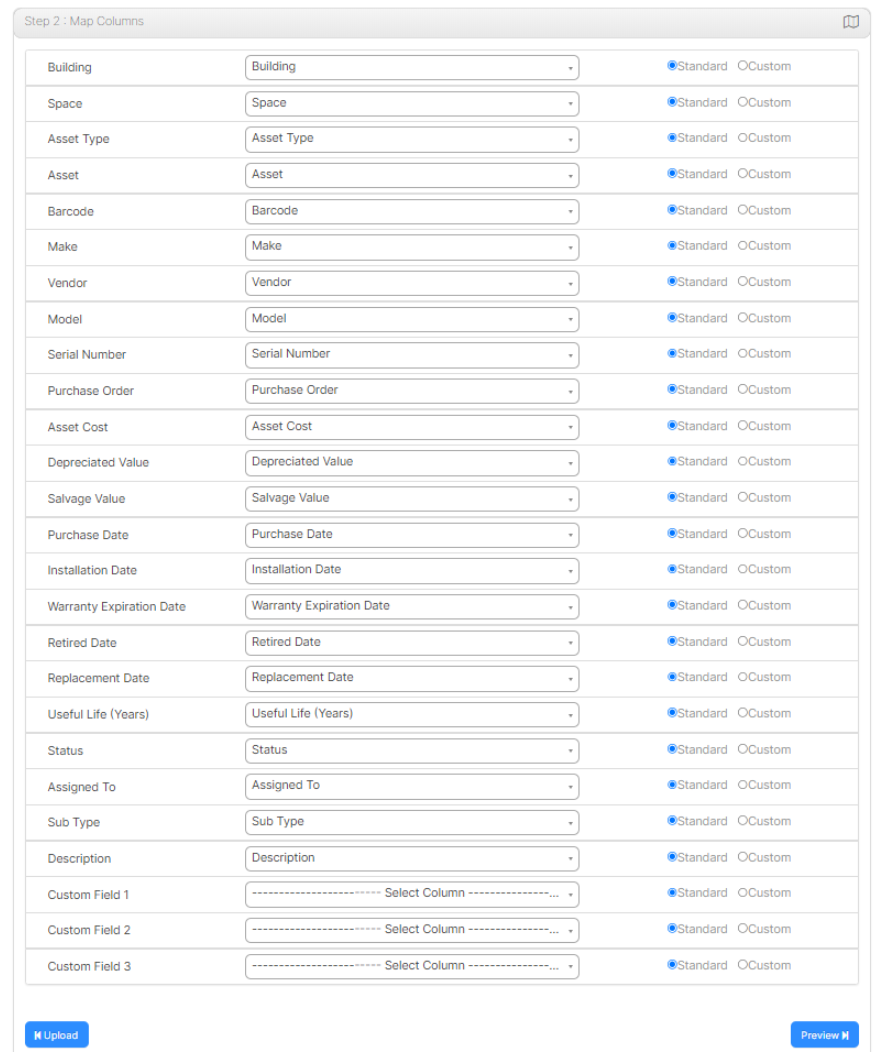
Notes:
- Column names from the Excel file appear on the left.
- If the column name is an exact match, the system field is listed automatically.
- If you map custom fields, select the Custom option.
- When importing custom fields, the asset type must have the custom field listed under Additional Information. Custom fields for asset types are managed under Assets > Manage Asset Types.
- Click Preview. The Preview page appears.
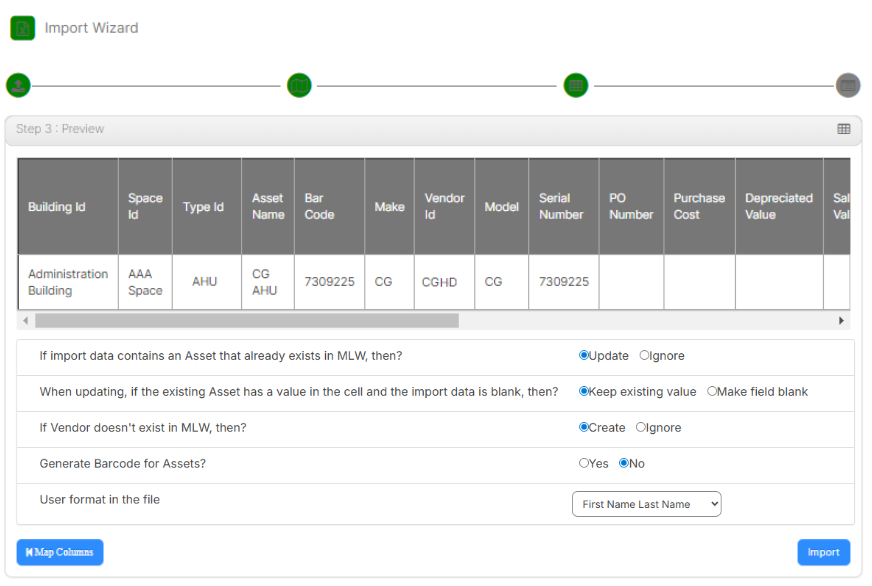
- Review the preview for accuracy.
- Click Import.
While the task is running, it appears under Running Tasks. Click Refresh to see the task's status. When the task is done, it appears under Completed Tasks.

To view the import log, click Download Output. The log shows the following:
- Total number of records in the file.
- Total number of records imported.
- Total number of records with errors, and the associated errors.