Check in assets
If you have the Edit Assigned User permission, you can check in assets.
To check in assets:
- Select Assets > Check In Assets. The Check-In Assets page appears.
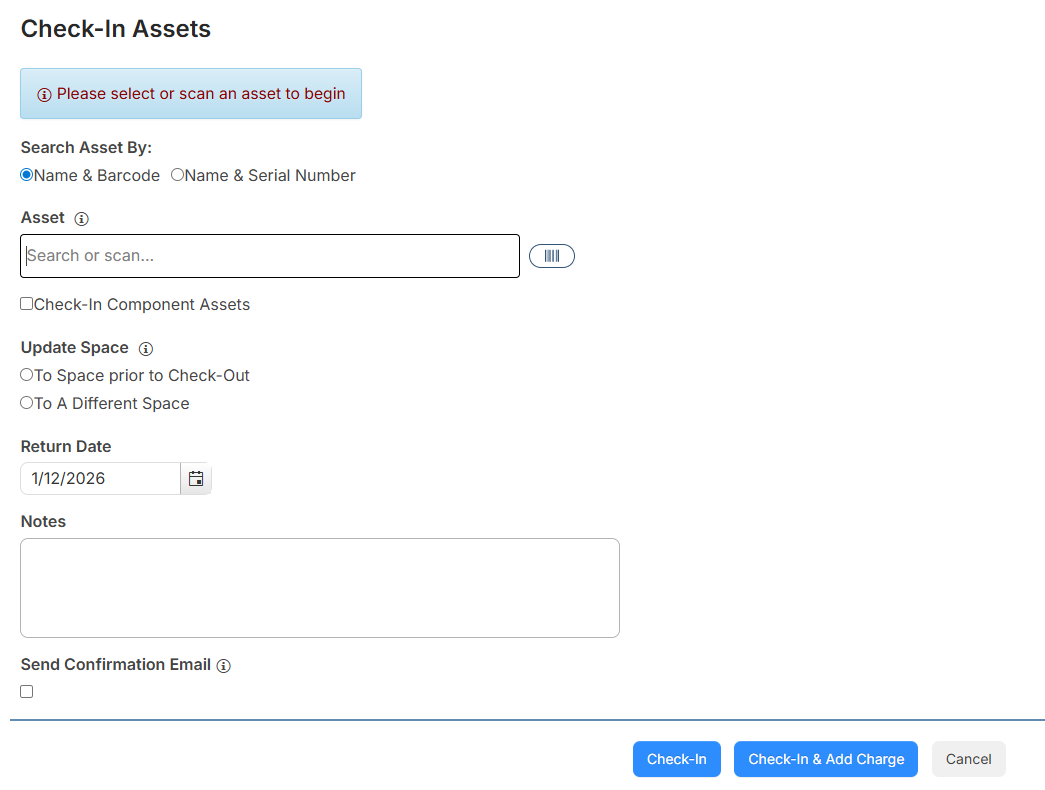
- In the Search Asset By section, select the method you want to use to search for assets.
- In the Asset field, search, scan, or type the asset barcode.
- To Include Component Assets, select the checkbox.
- To update an asset's space, select an option from Update Space.
Notes:
- The Update Space section only appears if you have the Edit Asset Space permission. If you do not select an option, the space will not change from the space selected at checkout.
- To revert the asset location to where it was before the checkout occurred, select To Space prior to Check-Out.
- To choose any other space, select To a Different Space.
- The Return Date defaults to the current date. To update it, type the date or click
 .
. - Add any Notes.
- To Send Confirmation Email to the user the assets were checked out to, select the checkbox.
- Do one of the following:
- To check in the asset, click Check-In.
- To check in and create a charge, click Check-In & Add Charge. The Add Charge for Checked In Assets page appears.
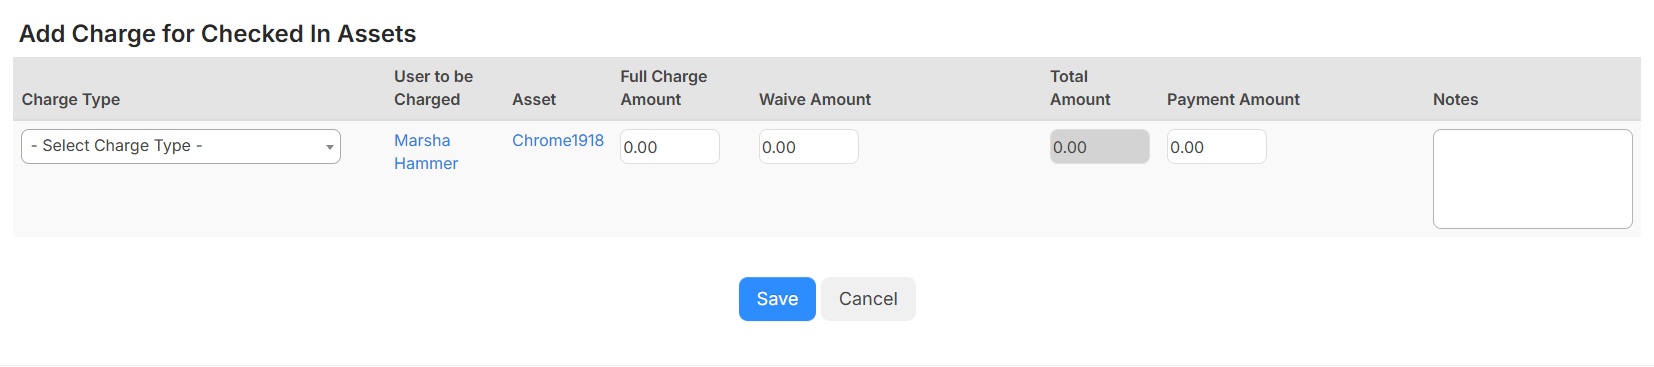
- Select a Charge Type from the drop-down.
- Enter the Full Charge Amount, Waive Amount, and/or Payment Amount.
- Add Notes.
- Click Save.
- Click OK on the confirmation pop-up.