Integrate with SIS Data Sync
SIS Data Sync lets you schedule an automatic import of student, staff, and building data from your student information system (SIS) to IT Asset Manager.
To access SIS Data Sync, select Settings > Integrations > SIS Data Sync Integration.
Connection tab
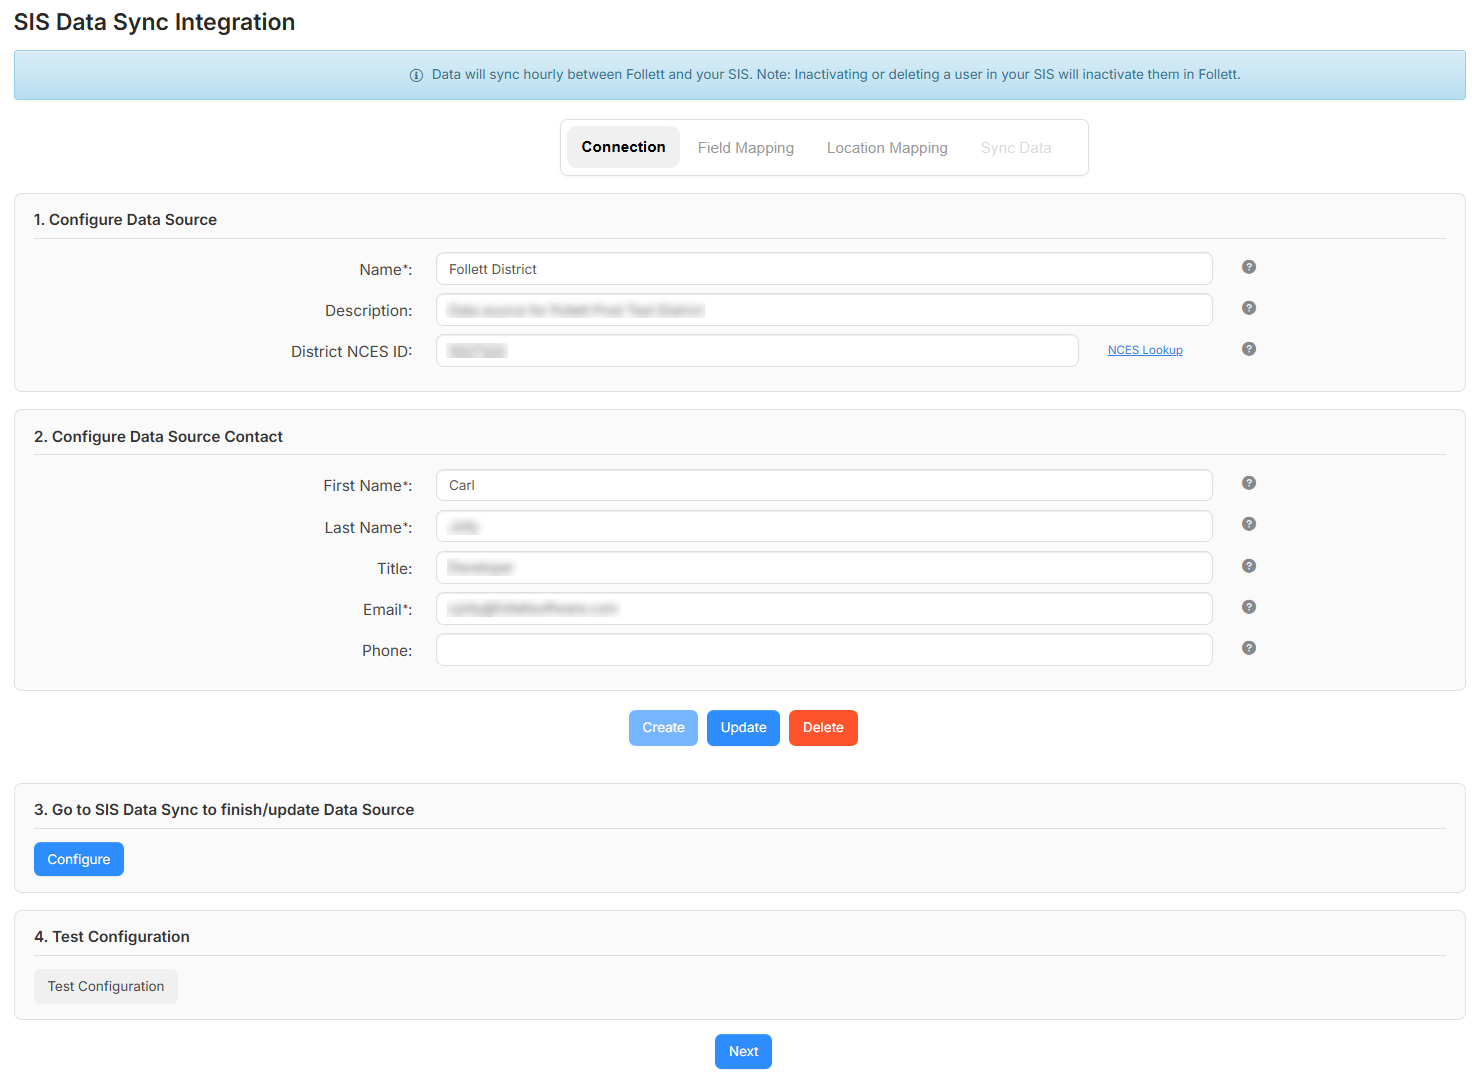
On the Connection tab, you need to establish a connection to the data source.
To create the data source:
- Enter the following information:
- Unique Name, such as the district's or school's subdomain of your URL
- District NCES ID
Note: If you do not know your NCES ID, click NCES Lookup and search for your district or school.
- First Name
- Last Name
- Click Create.
- Click Configure. A pop-up shows your Verification Code and a link to configure your SIS.
Note: Select the SIS your district uses, and enter configuration data based on it.
- To test the configuration, click Test Configuration.
Field Mapping tab
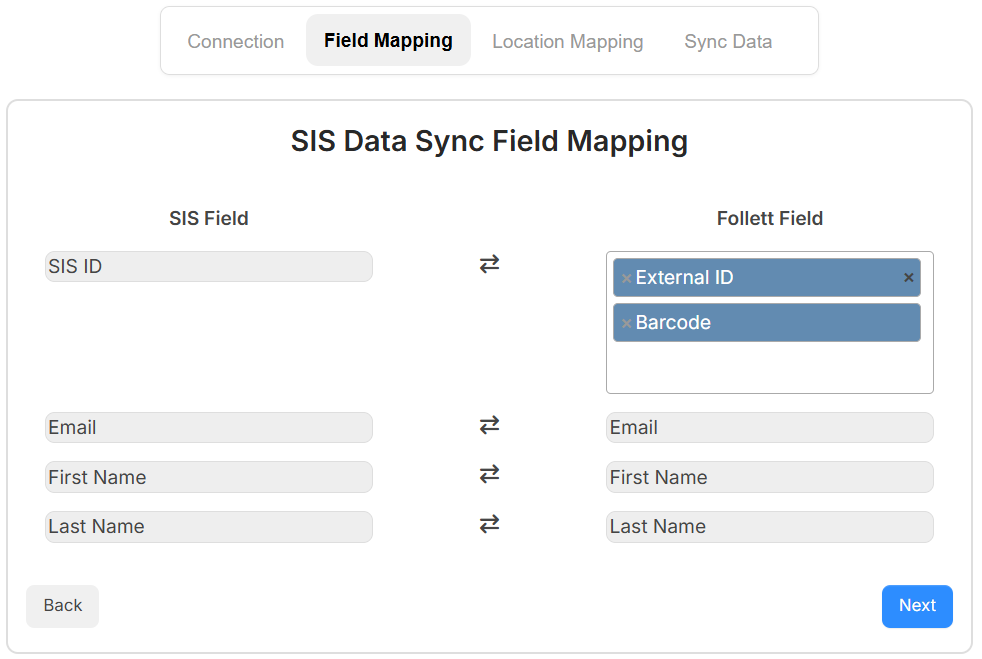
This tab shows the SIS fields and which fields they will map to in IT Asset Manager.
- Map the SIS ID field to the External ID field, the Barcode field, or both.
- Click Next to move to the Location Mapping tab.
Location Mapping tab
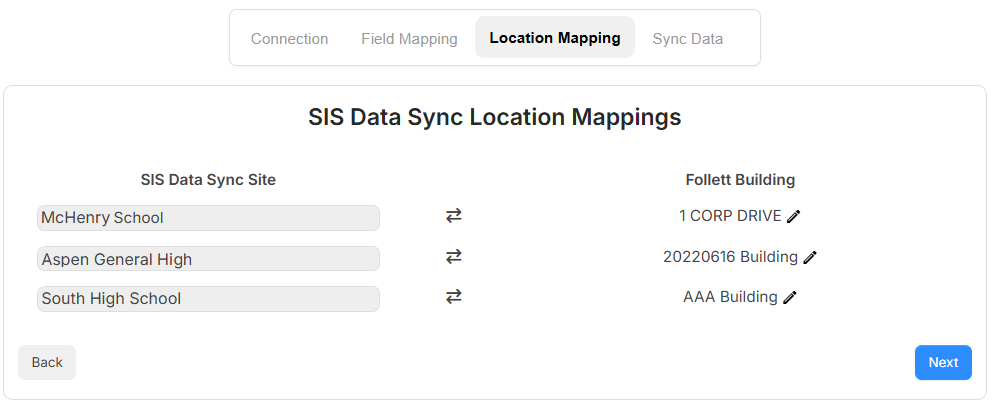
This tab lets you see the SIS sites, and link them to buildings in IT Asset Manager.
|
Note: If data cannot be found, click Refresh. If your first SIS Data Sync synchronization has not been approved by Follett Support, a message appears asking you to contact Technical Support. You cannot map locations or start synchronization until approval is complete. |
To complete the Location Mapping tab:
- To add or change a Follett Building, click
 .
. - From the drop-down, select the correct building, and then click
 .
. - Click Next.
Sync Data tab
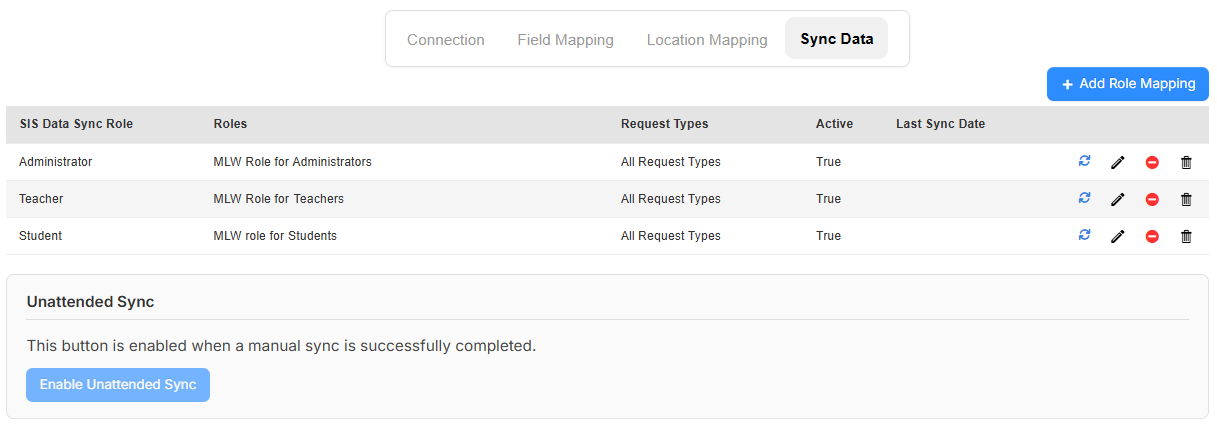
This tab lets you associate roles.
- To add a role, click +Add Role Mapping. A pop-up appears.
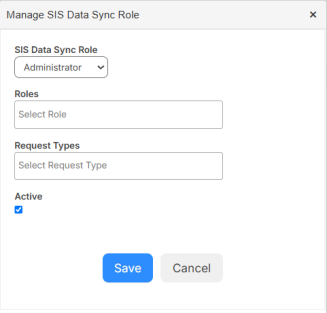
- From the SIS Data Sync Role drop-down, select Administrator, Teacher, or Student.
- From the Roles drop-down, select the associated role(s).
- To associate a role to Request Types, use the drop-down.
- If this role should be Active, ensure the checkbox is selected.
- Click Save.
- To sync data right away, click
 in the applicable row. Otherwise, the data syncs every hour.
| Note: To process webhook events, click Enable Unattended Sync. Webhook events are near-real-time notifications that push SIS changes into IT Asset Manager after those changes are detected. |