Integrate with ClassLink (SAML)
Users with the Manage District Settings user permission can set up single sign-on with ClassLink. This integration creates user accounts as users log in for the first time.
This is a three-step process:
- In ClassLink, add a new SAML application.
- Enable domain-wide delegation to the new service account.
- Add IT Asset Manager data to ClassLink.
|
Important: Because of the technical knowledge required, your district's IT administrator will most likely need to perform this procedure. |
Step 1: In ClassLink, add a new SAML application
A few things to do while setting up the SAML application in the ClassLink SAML Console:
- Fields are case sensitive.
- Copy the existing template.
- Copy the IdP Metadata URL for IT Asset Manager.
|
Note: ClassLink’s interface and field names may have changed since this was written. Use these steps as a general guide, and select the closest matching options in your ClassLink portal. |
Step 2: Enable domain-wide delegation to the new service account
| Note: A user with the Google super administrator role is required to perform this task. |
- In IT Asset Manager, select Settings > Single Sign On > SAML Configuration. The SAML Integration Admin page appears.
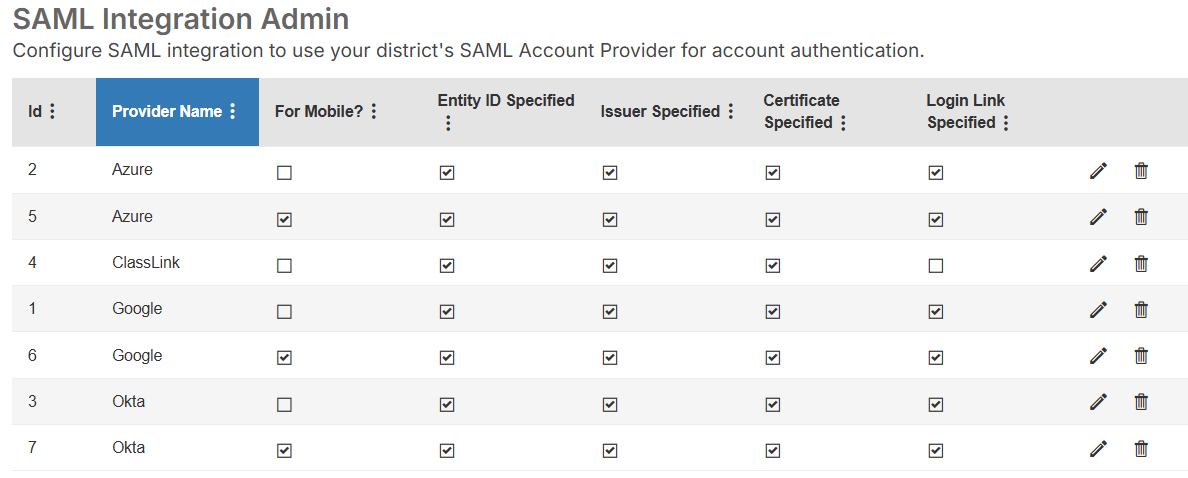
- Next to ClassLink, click . A pop-up appears.
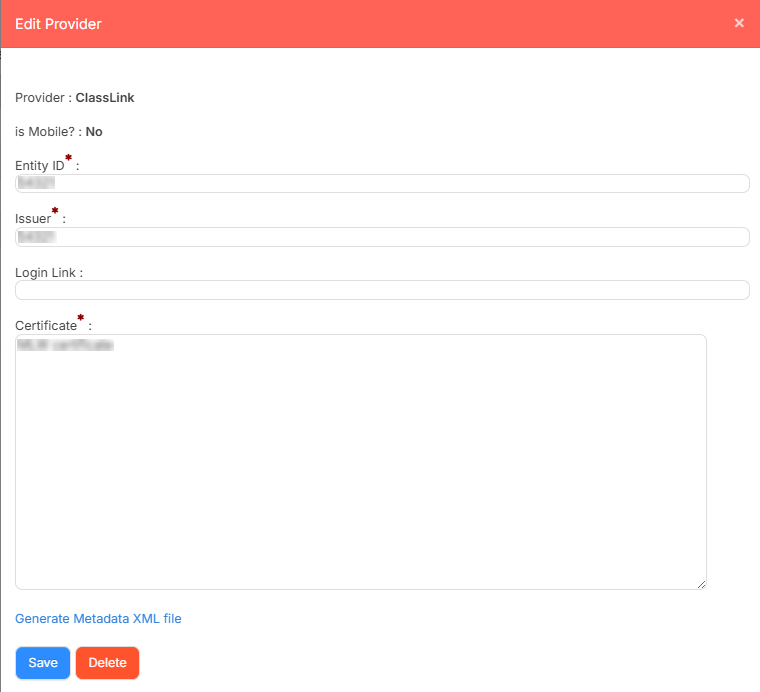
- Do the following:
- Under Entity ID, enter your ClassLink identifier.
- Under Issuer, enter the IdP Metadata URL from ClassLink.
- Enter the Login Link, if desired.
- Under Certificate, enter the IdP Certificate.
Note: You download this certificate from ClassLink.
- Click Generate Metadata XML file, and then copy the information.
- Click Save.
Step 3: Add IT Asset Manager data to ClassLink
To complete the connection, go back to ClassLink and do the following:
- Paste the information from the Generate Metadata XML file to the ClassLink METADATA field.
Note: Before pasting the file information, delete "Change Me" in the METADATA field.
- Add the IT Asset Manager app to your ClassLink launchpad.